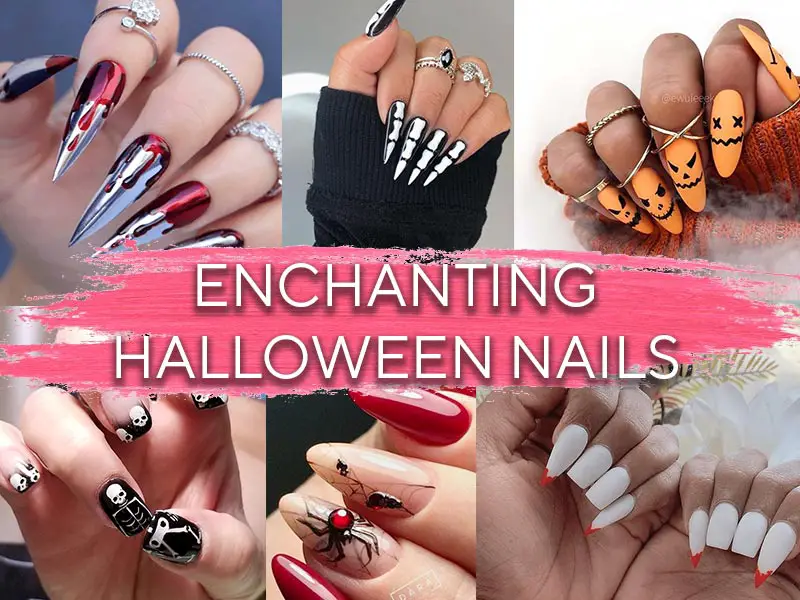
As the anticipation of frightful festivities grows, the moment has arrived to contemplate the adornment of oneself and the surroundings for the upcoming occasion. Precisely curating your makeup and Halloween nails design is of paramount significance, as they must harmonize with the costume meticulously selected for the impending night.
This offers an opportunity to elevate your nail aesthetics with an enchanting transformation. Whether one finds themselves nestled cozily on a sofa engrossed in a chilling cinematic experience or elegantly attired for a social gathering, the presented nail art designs unequivocally guarantee a commemoration of autumn’s most spirited holiday.
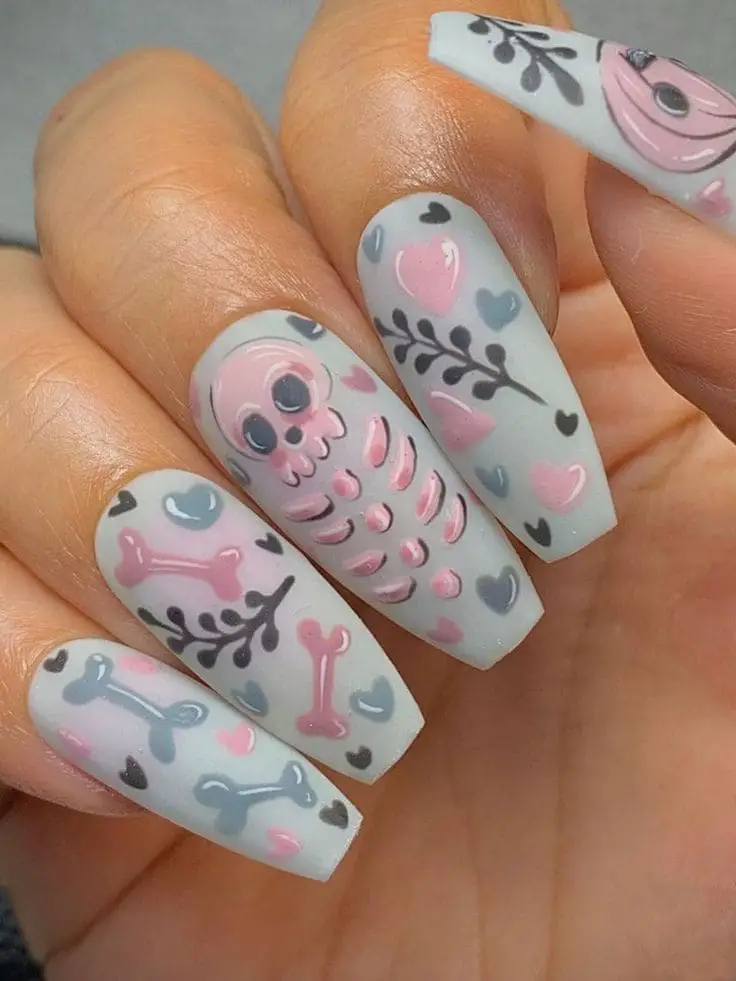
1. Classic Themed Halloween Nails
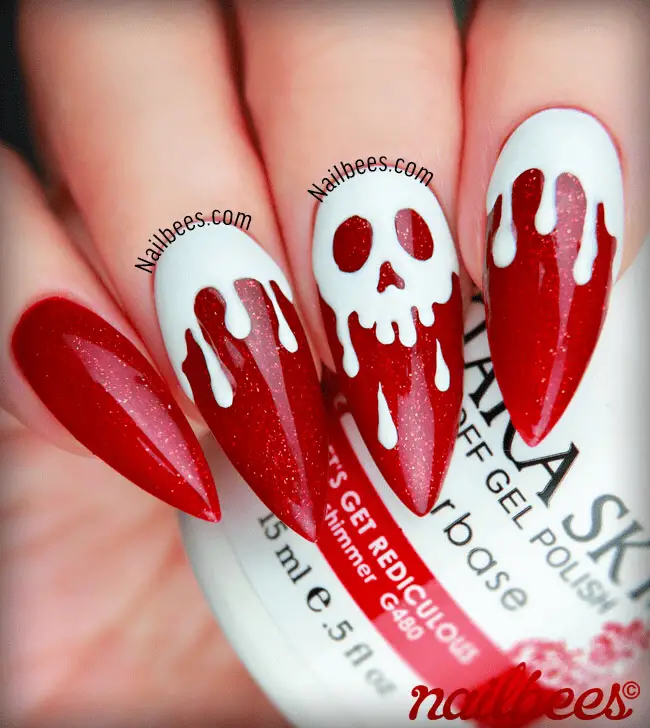
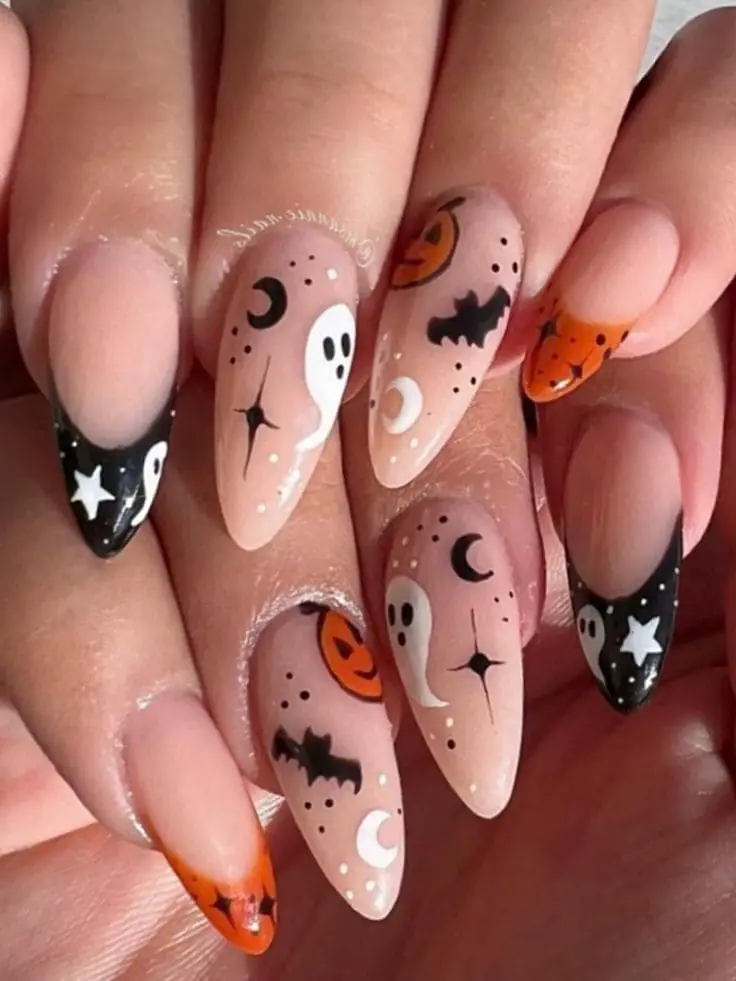
Let’s dive into the captivating realm of classic Halloween-themed nail art. As a seasoned professional nail enthusiast, I understand the importance of embracing iconic motifs like pumpkins, ghosts, bats, and spiders to create captivating designs that embody the spirit of the holiday.
a. Pumpkins
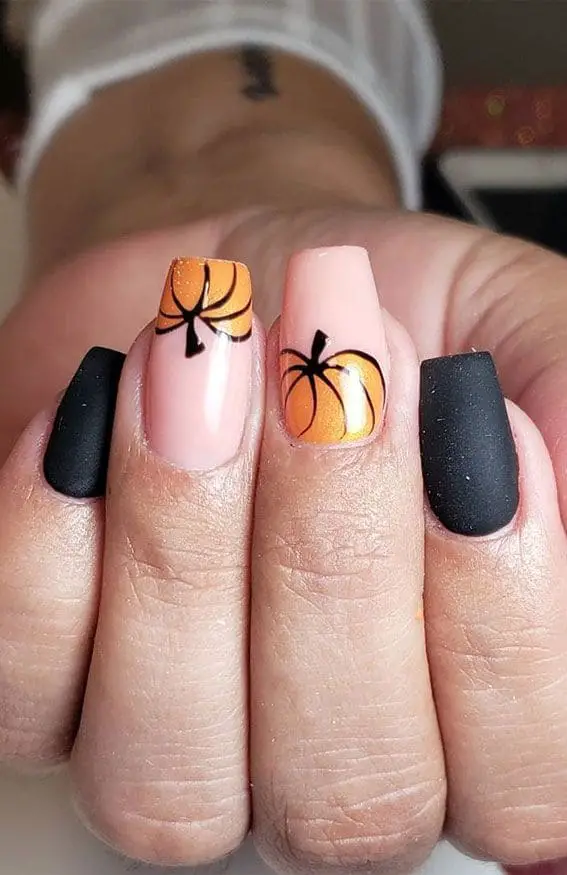
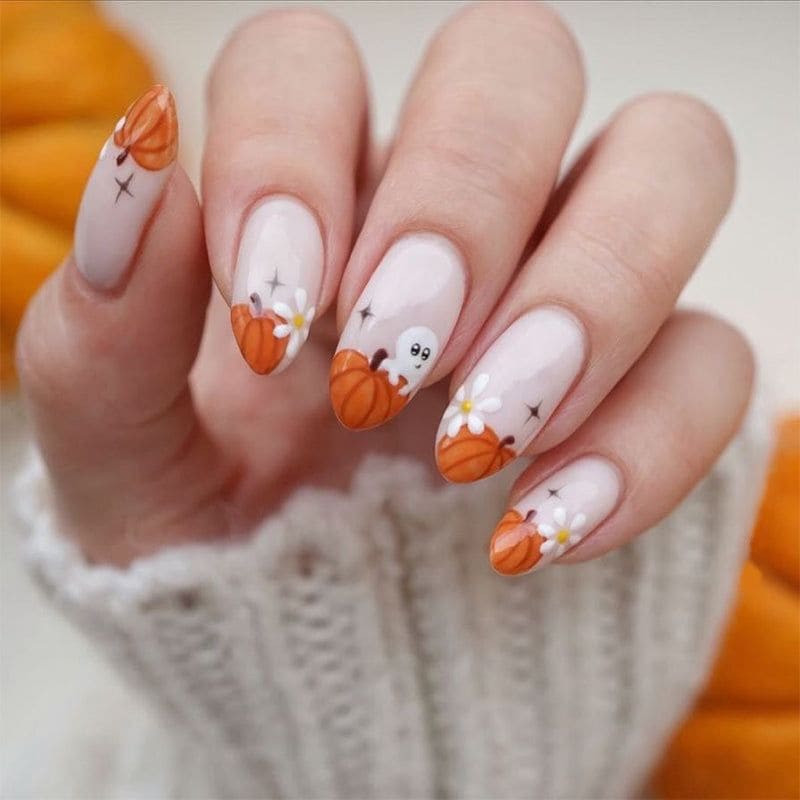
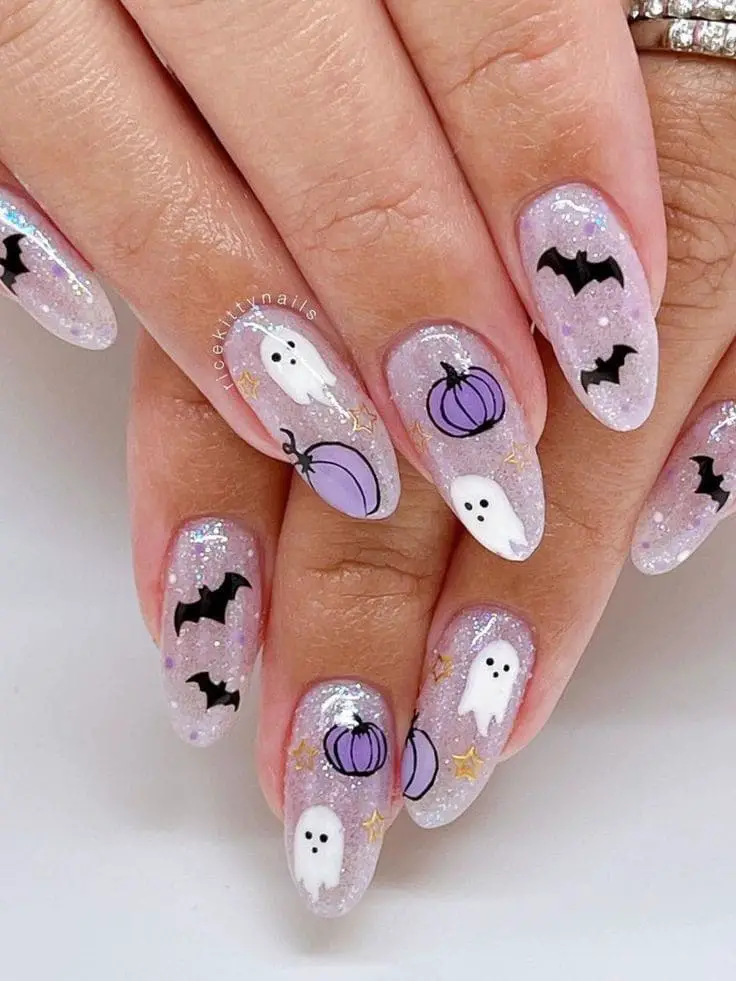
Pumpkins are the heart of Halloween, symbolizing both autumn’s harvest and the enchanting world of the supernatural. Here’s how I would artfully incorporate pumpkins into nail designs:
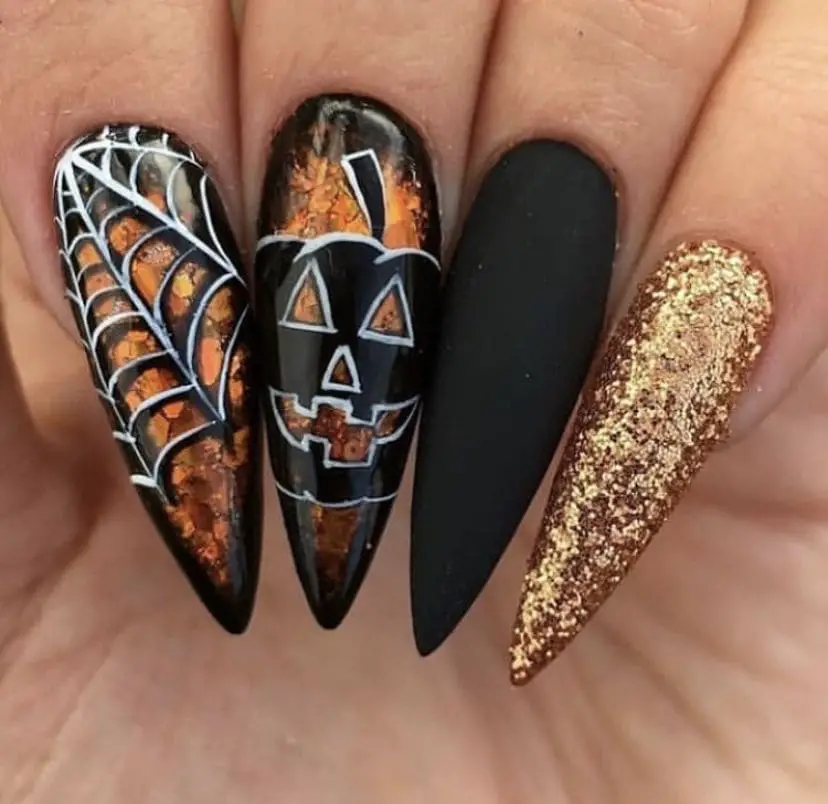
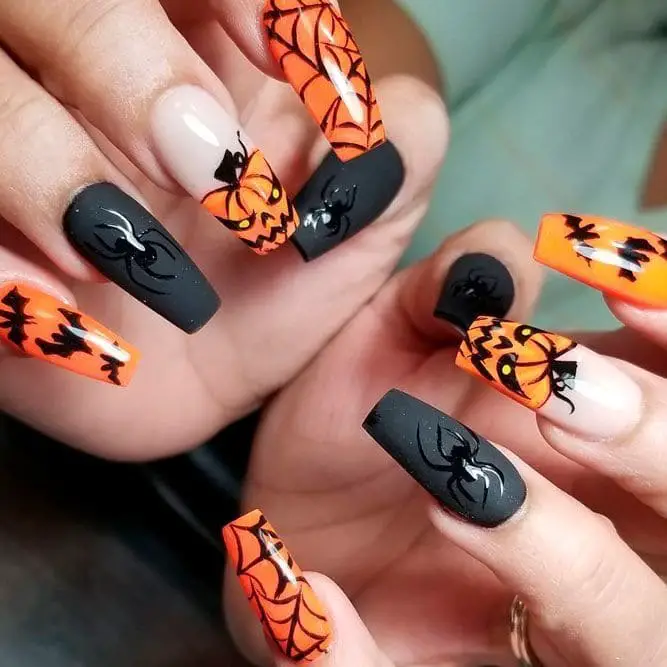
Jack-o’-Lantern Faces: Craft intricate jack-o’-lantern faces on accent nails for a whimsical touch that captures the playful essence of the holiday.
Pumpkin Patch Scene: I adore creating a nail art tableau featuring a vibrant pumpkin patch scene on multiple nails. This lets me infuse diverse pumpkin sizes and colors, adding depth to the design.
3D Pumpkin Accents: I often use mini 3D pumpkin accessories to create a tactile effect that brings the design to life. It’s a stunning way to add texture and intrigue to the overall look.
b. Ghosts
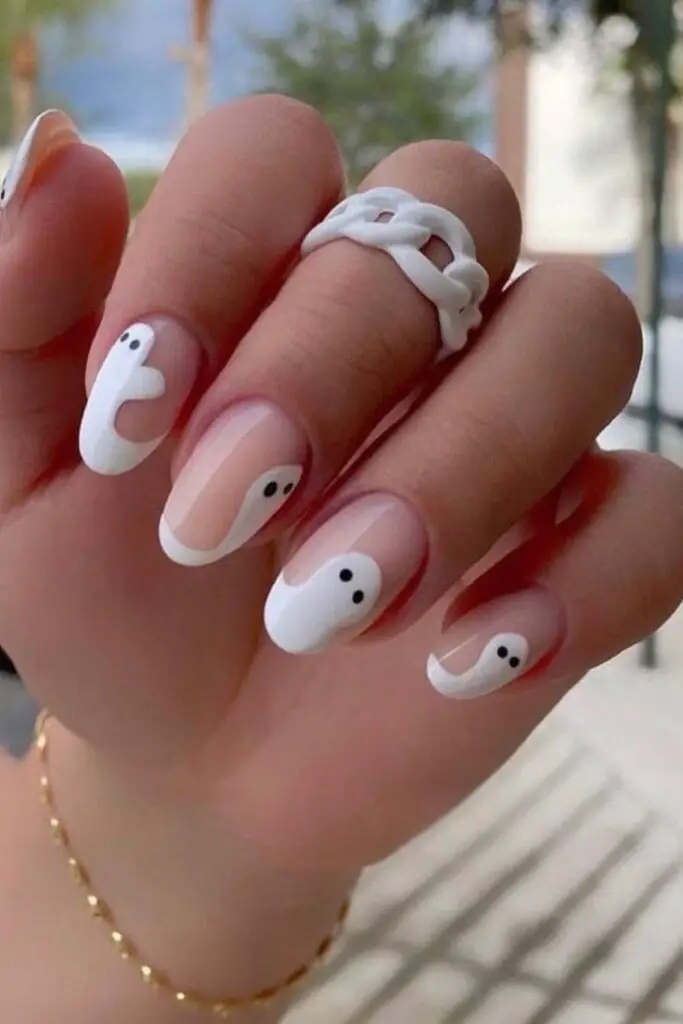
Ghosts evoke the ethereal charm of Halloween, providing a canvas for both spooky and endearing Halloween nails designs:
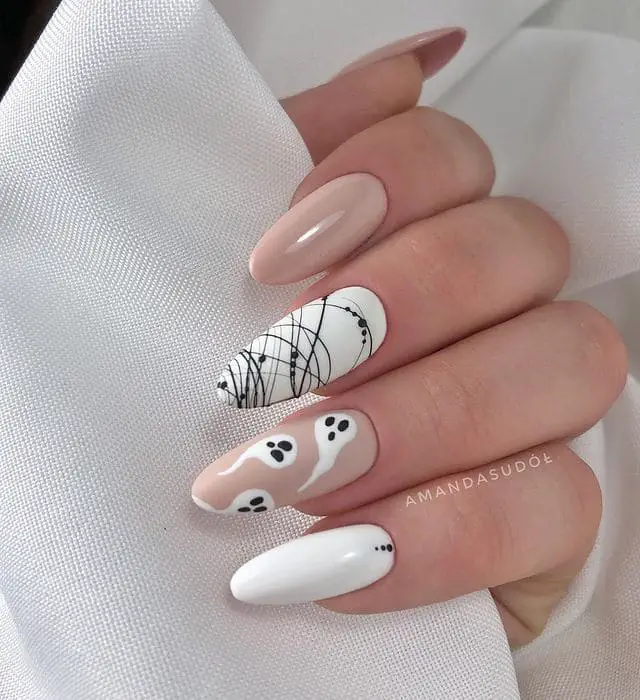
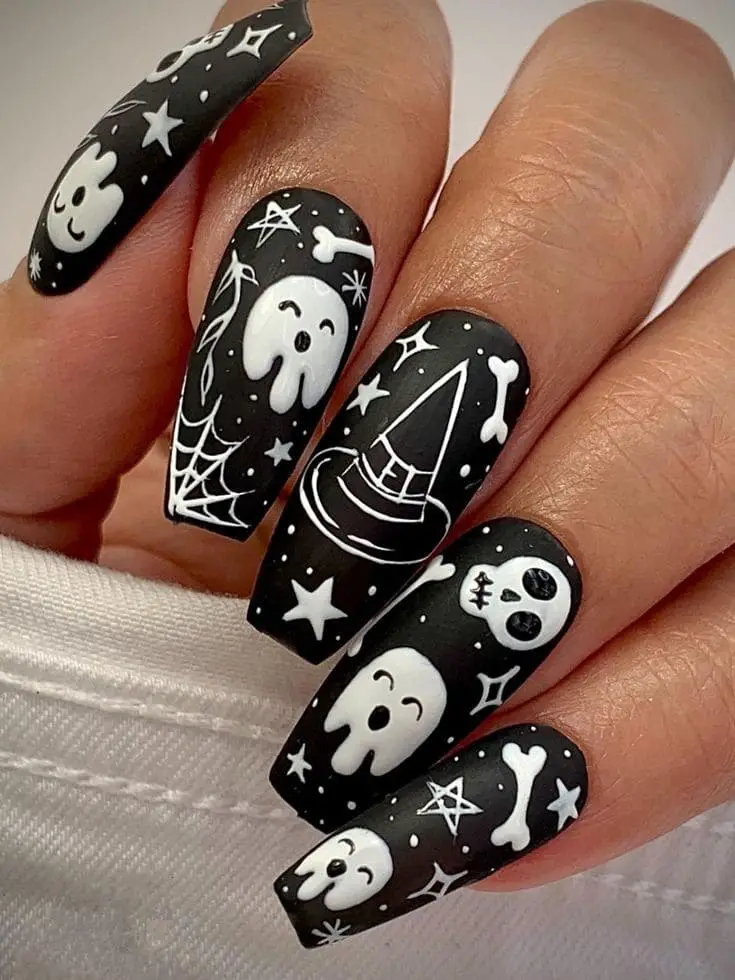
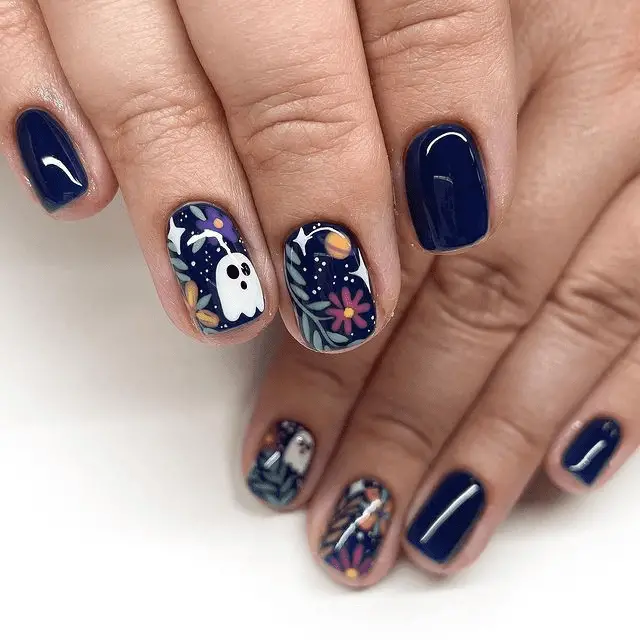
Floating Ghosts: Painting ethereal white ghost silhouettes against a deep, dark background imparts a sense of mystery and elegance.
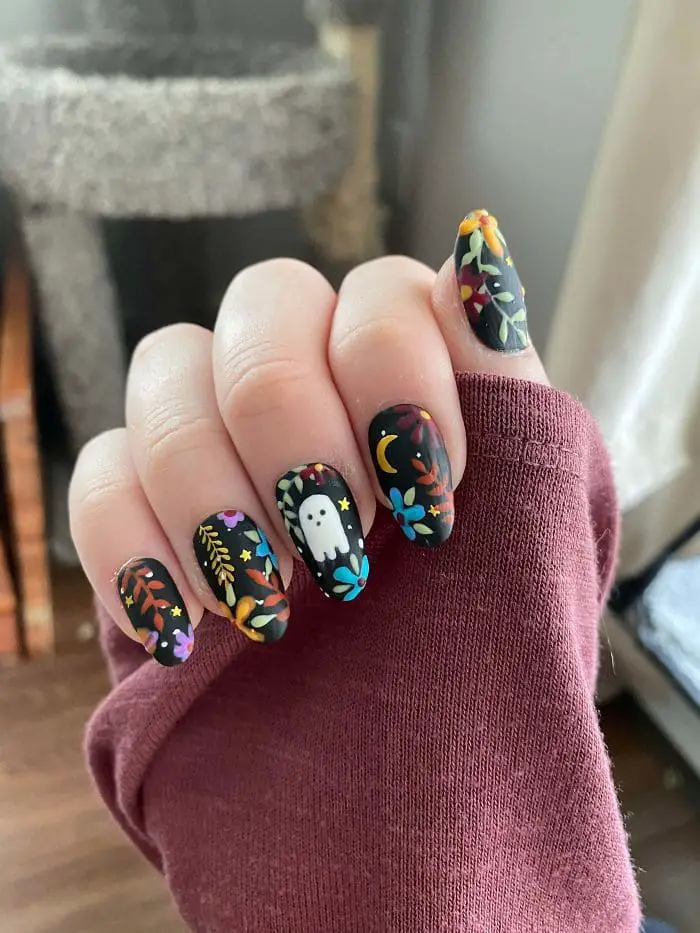
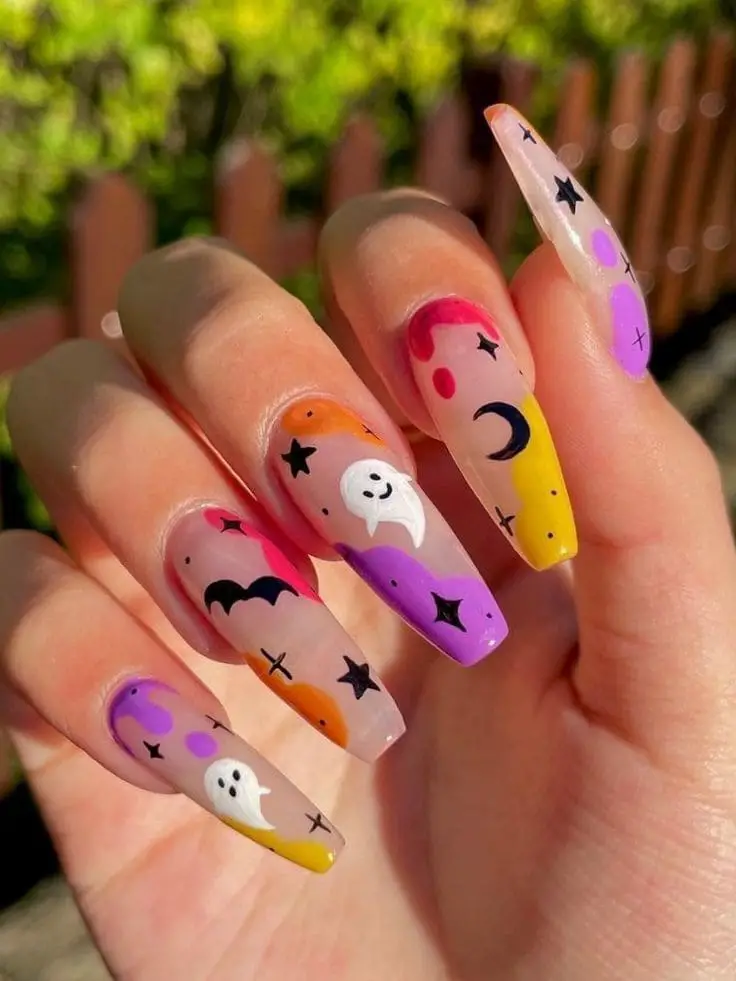
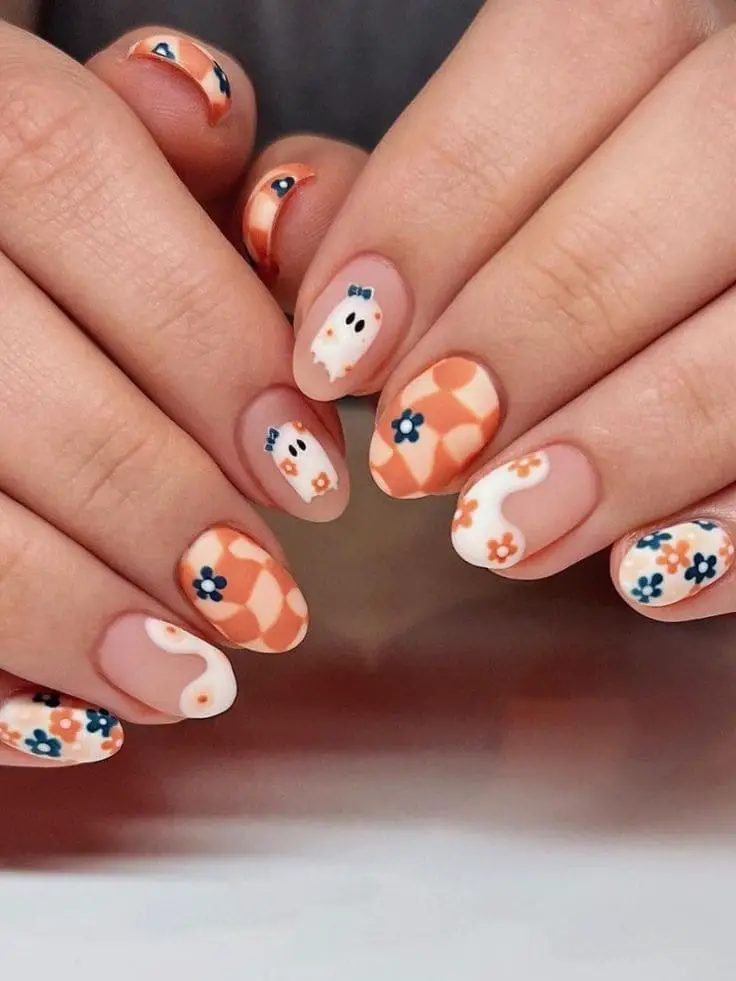
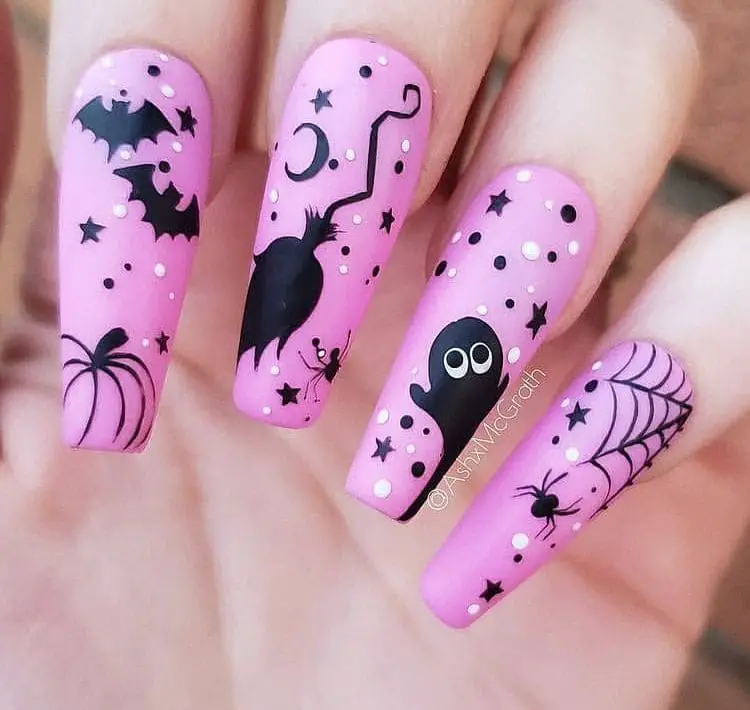
Friendly Ghosts: To create a lighthearted ambiance, I enjoy crafting cute ghost characters with playful expressions and subtle details.
Negative Space Ghosts: I employ negative space techniques, allowing the natural nail to shape the ghost outlines. This technique adds a touch of sophistication to the design.
c. Bats
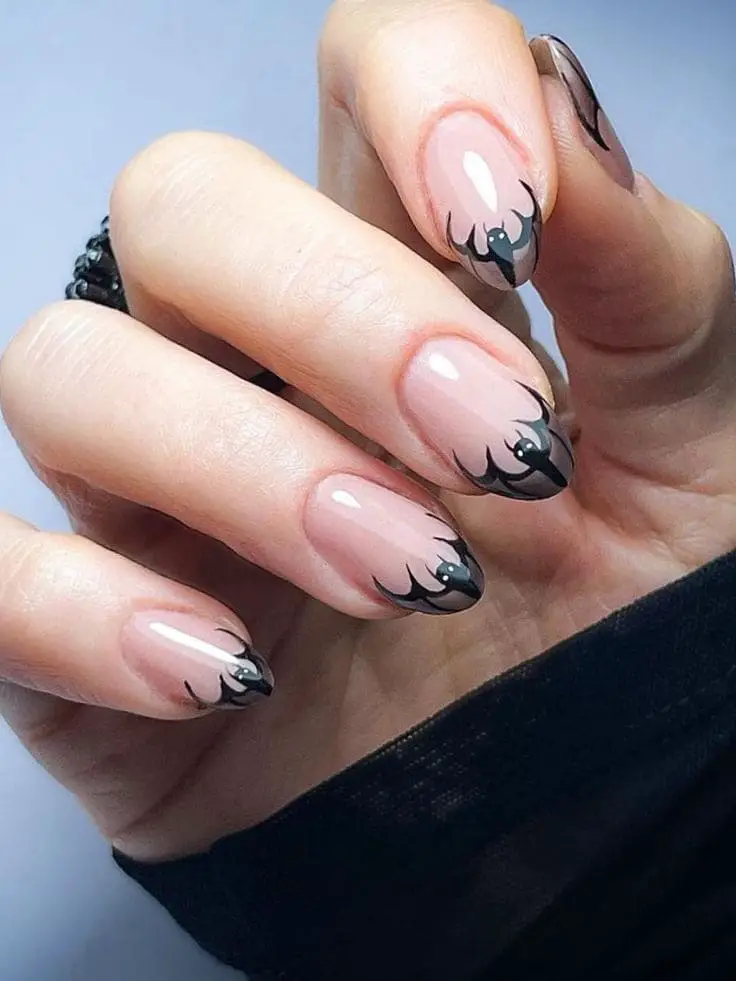
Bats are a favorite of mine for their ability to create a dramatic, nocturnal atmosphere in nail art:
Silhouette Bats: Contrasting black bat silhouettes against a moody, moonlit backdrop lends an air of mystery and intrigue.
Bat Swarm: For a dynamic look, I use precise brushstrokes to craft a bat swarm in motion across the nails, offering a sense of depth and movement.
Ombre Bat Accents: Combining the popular ombre technique with bat decals or stamping allows for a seamless gradient effect that’s truly eye-catching.
d. Spiders
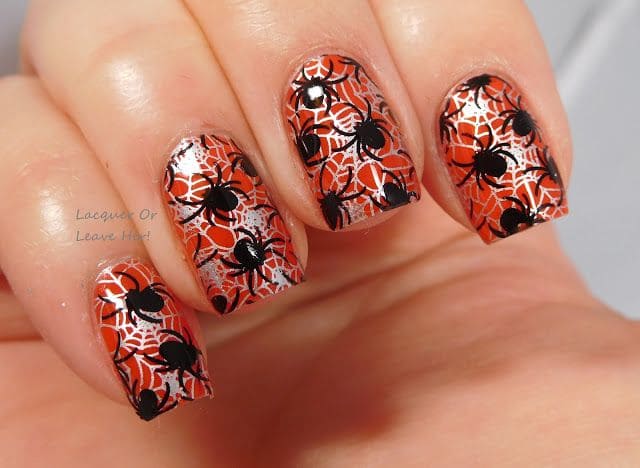
Spiders and their intricate webs add a touch of the eerie to Halloween nails:
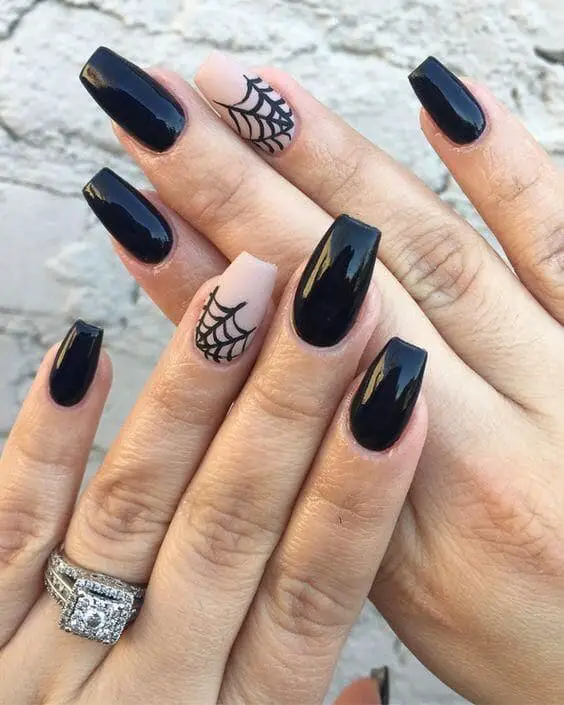
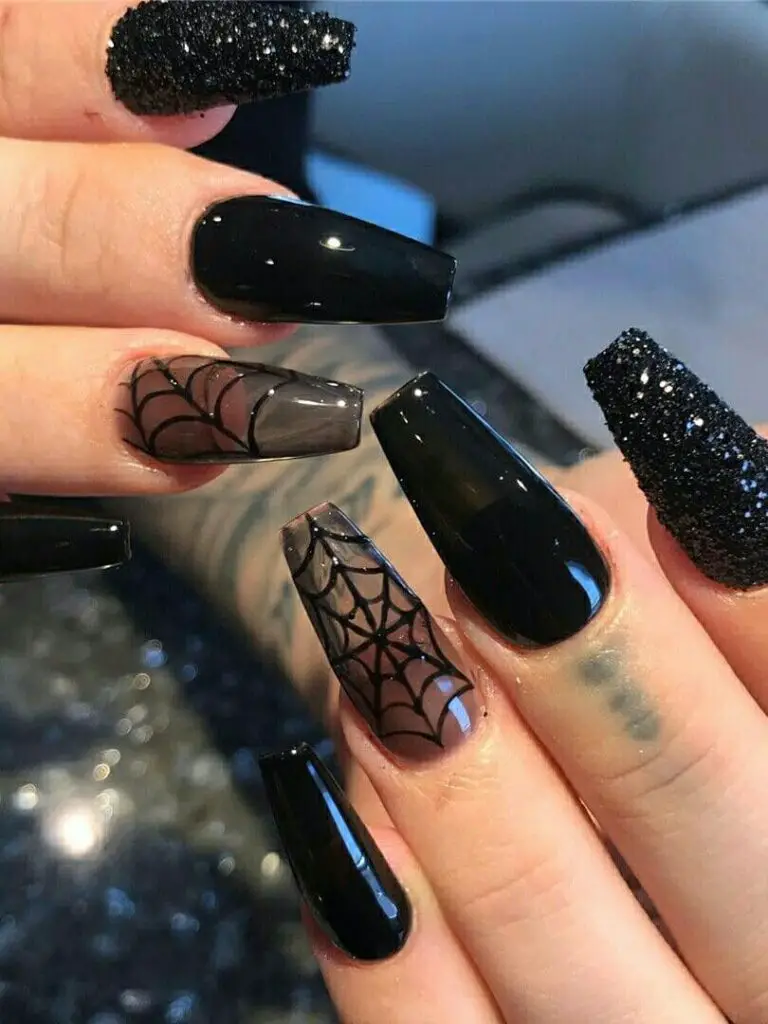
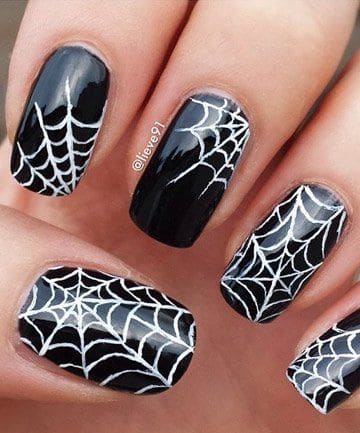
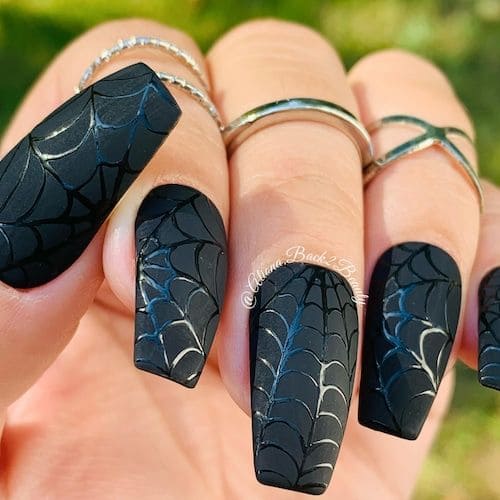
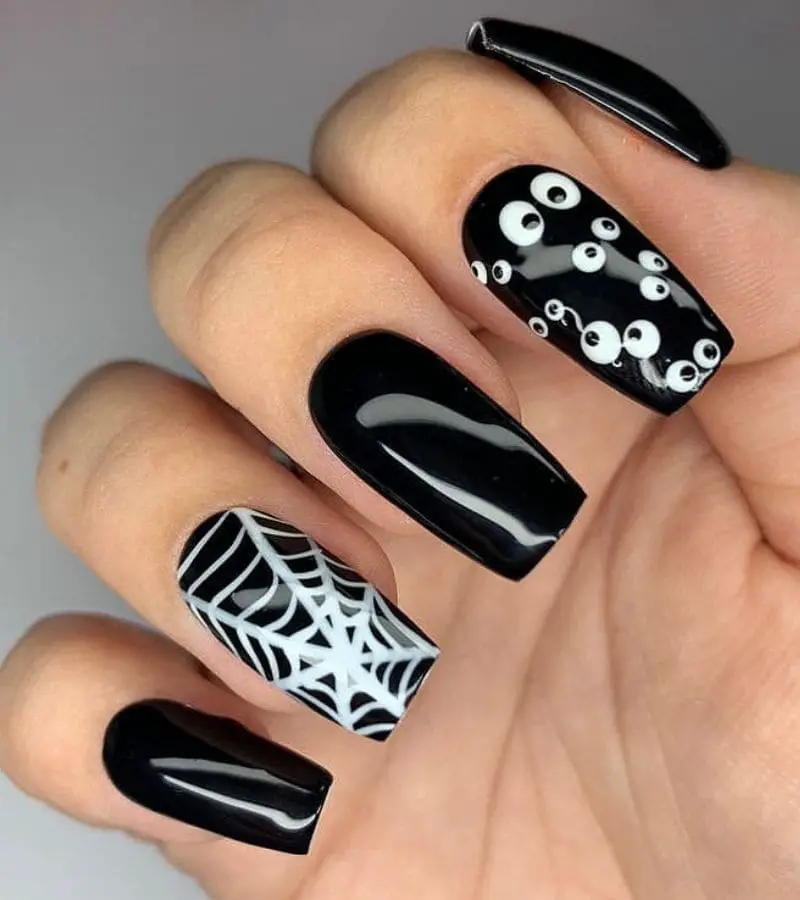
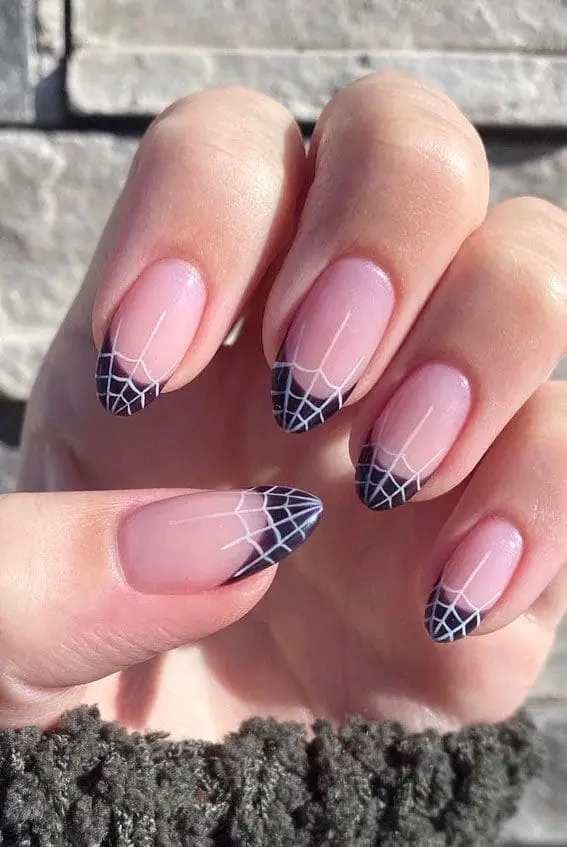
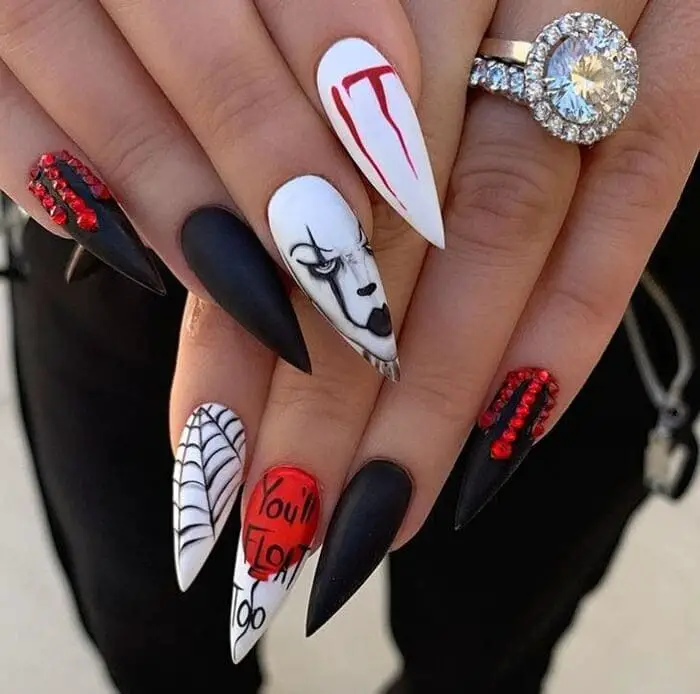
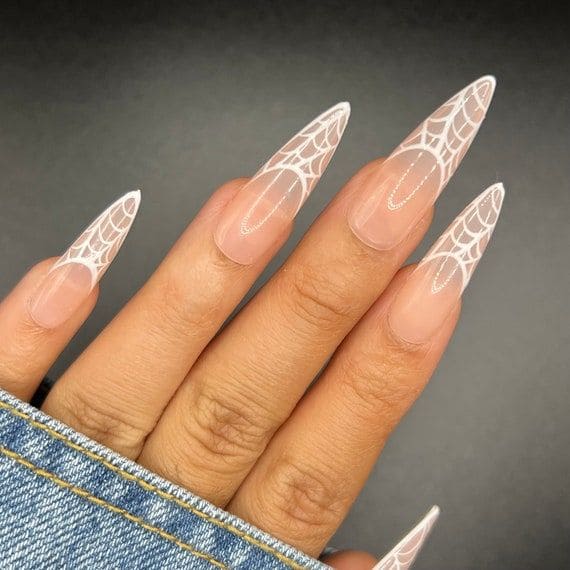
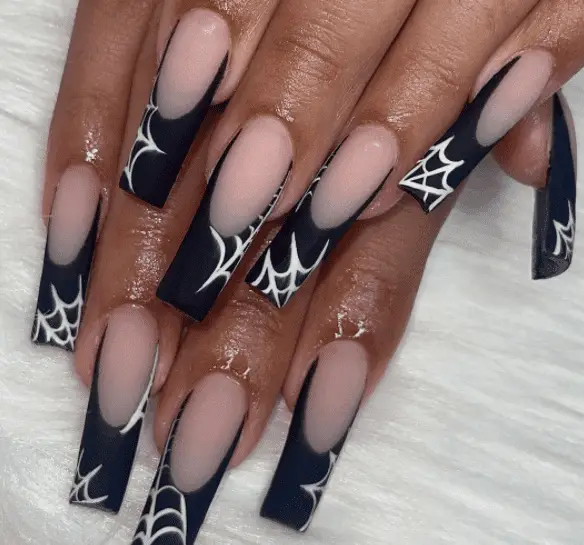
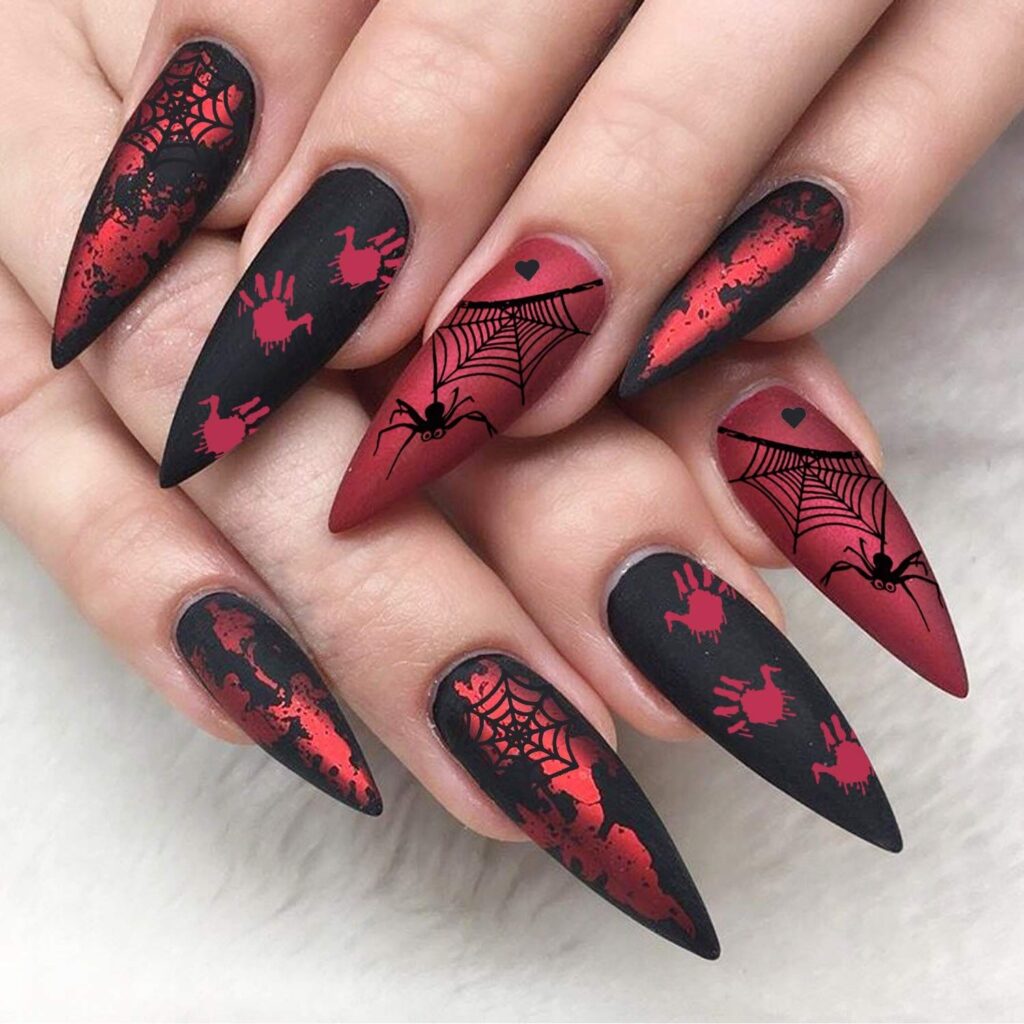
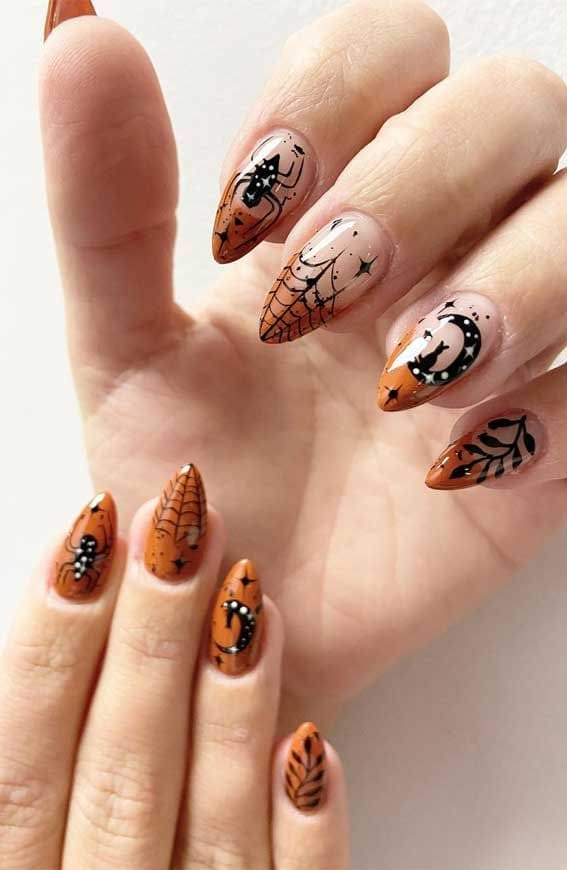
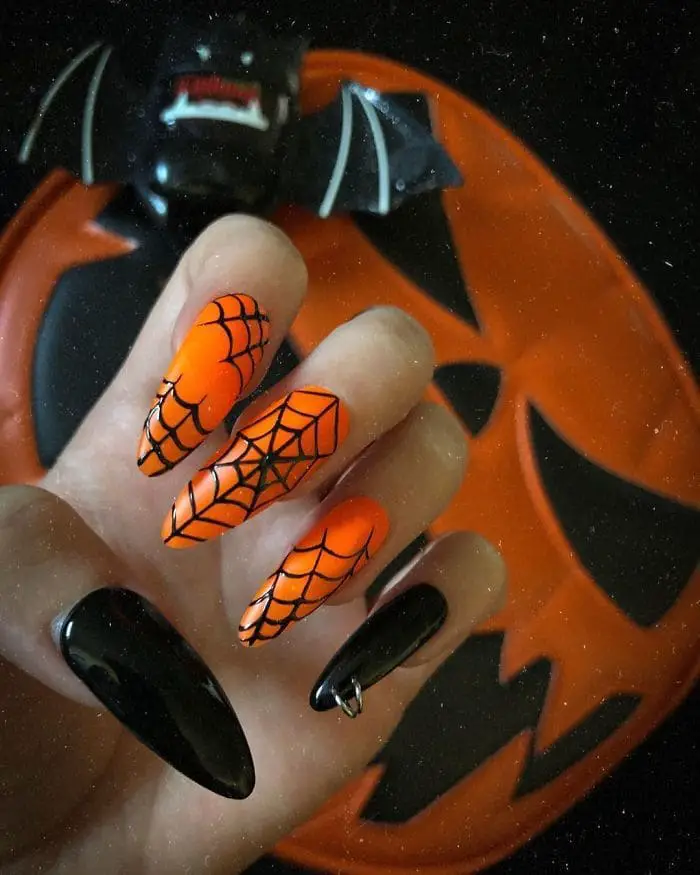
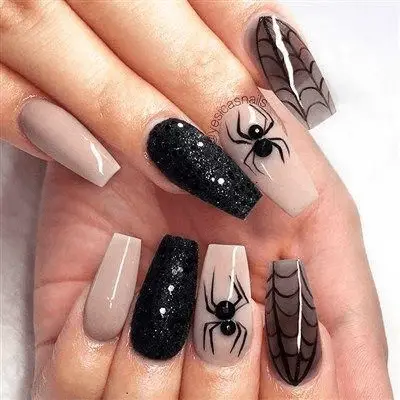
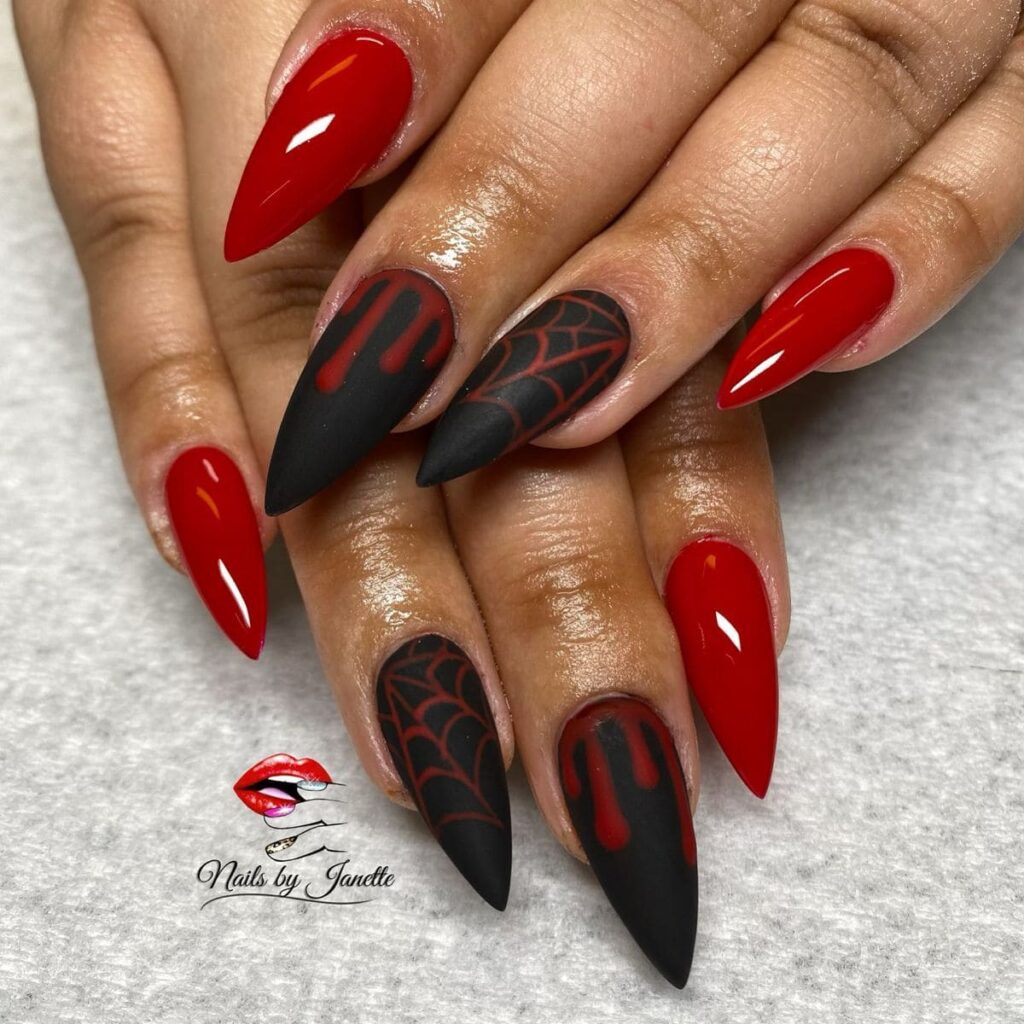
Web Accents: I love accenting nails with intricate spider web patterns, sometimes utilizing fine brushes or nail art tools to achieve delicate lines.
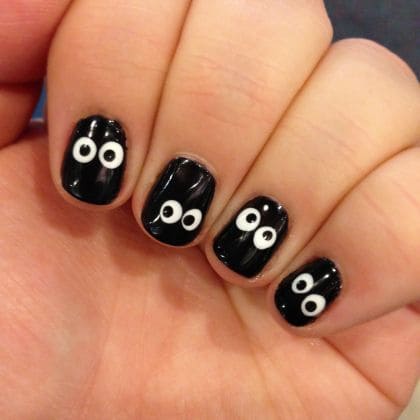
Playful Spider Designs: For a playful twist, I create charming spider characters with googly eyes or whimsical expressions.
Elegant Jeweled Spiders: Adding tiny rhinestones to spider designs mimics the glistening of a spider’s web, creating an elegant and luxurious effect.
e. Color Palette
The color palette is crucial in classic Halloween nail art:
Base Colors: I opt for rich blacks, enchanting purples, deep oranges, and mystic greens as base colors, setting the mood for the design.
Accent Colors: Adding accents of white, gold, or silver elevates the motifs and adds striking contrast to the overall composition.
In the realm of classic Halloween-themed nail art, the possibilities are boundless. As a professional nail enthusiast, I relish the opportunity to incorporate pumpkins, ghosts, bats, and spiders into intricate designs that bring the spirit of the season to life on each fingertip. The interplay of iconic symbols and creative techniques allows me to craft unique, captivating nail art that resonates with the holiday’s enchanting atmosphere.
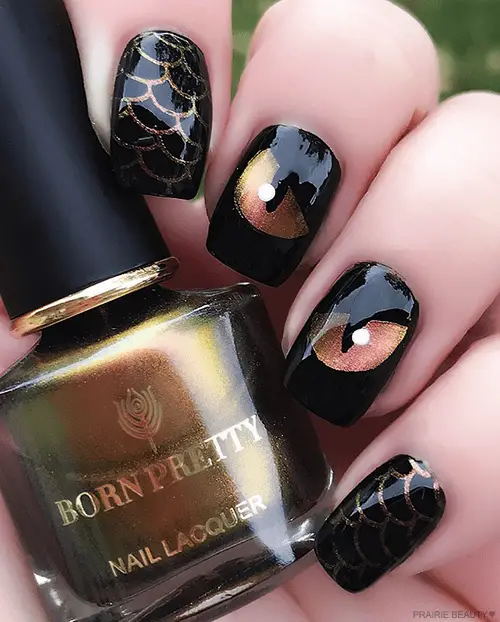

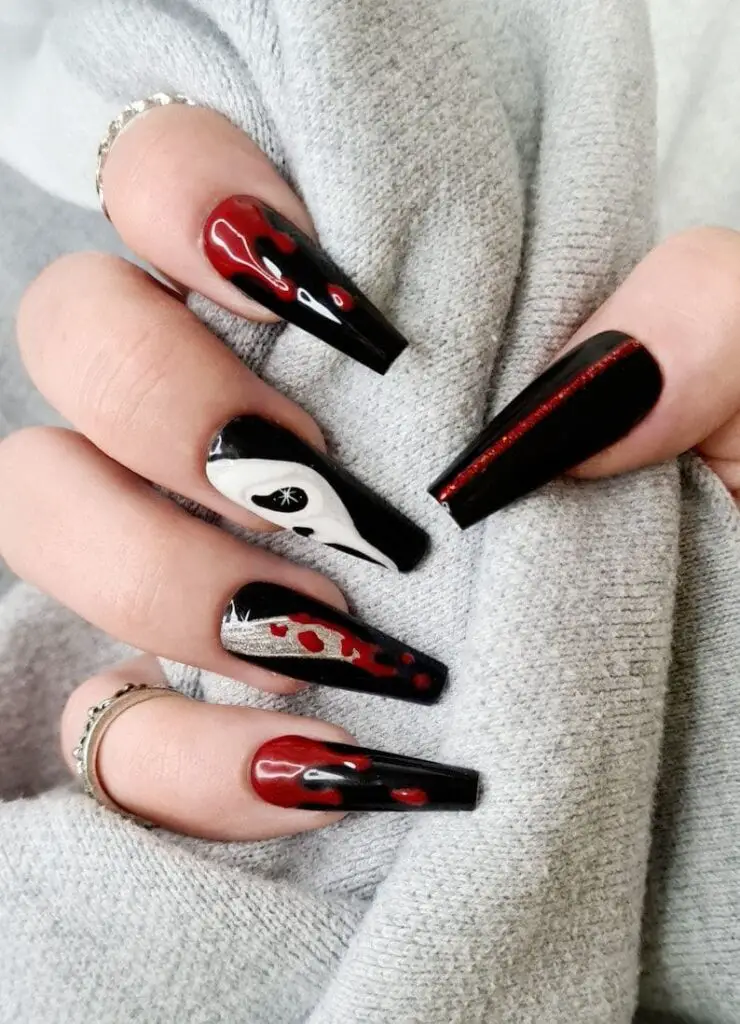

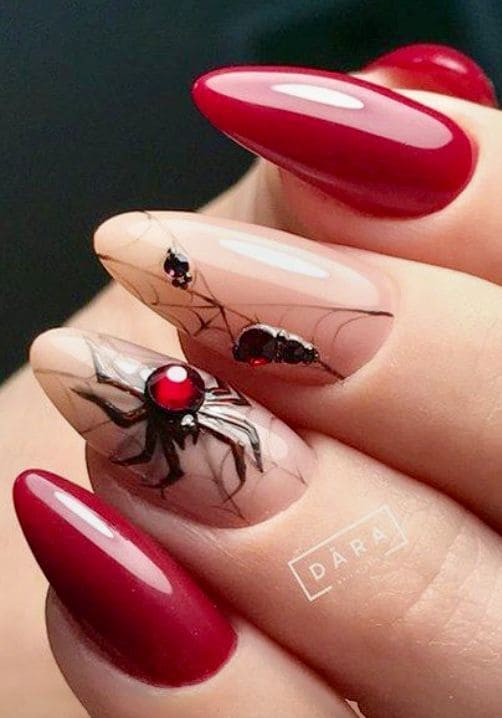

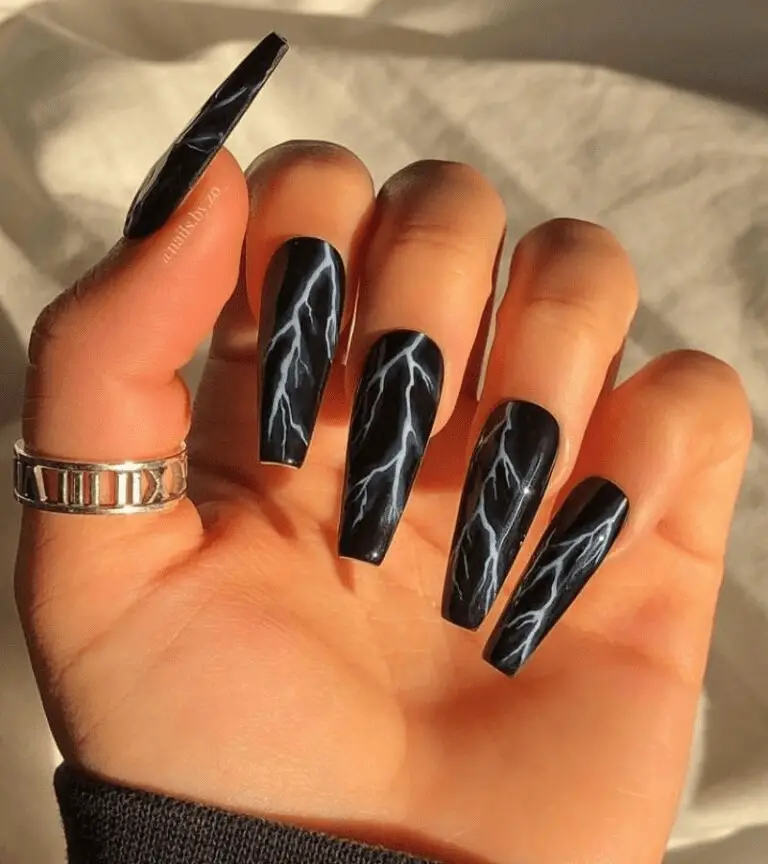
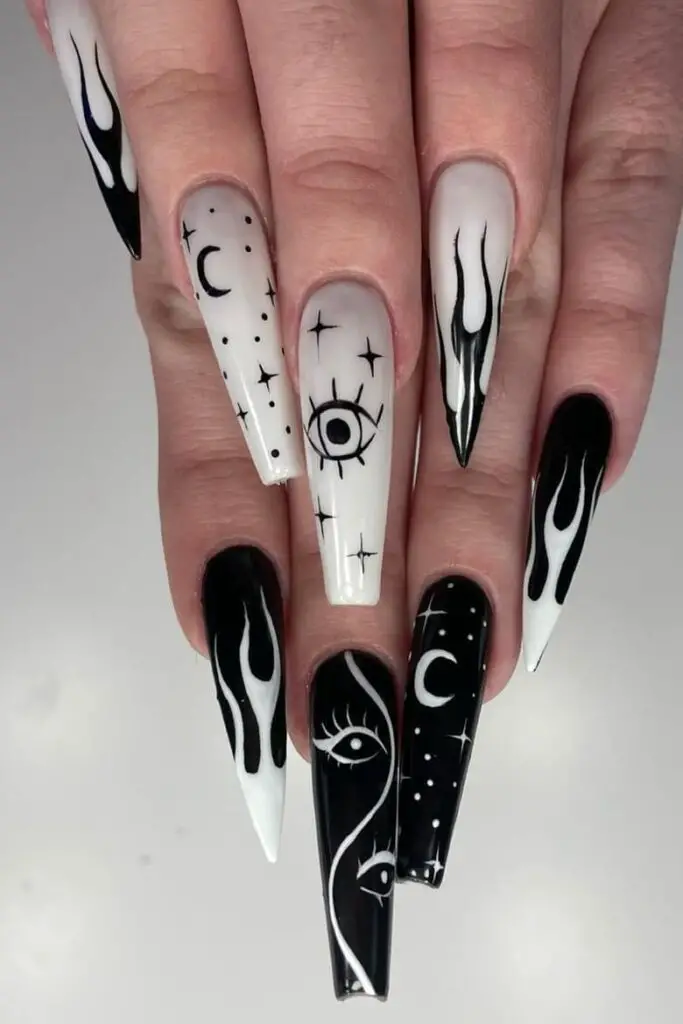
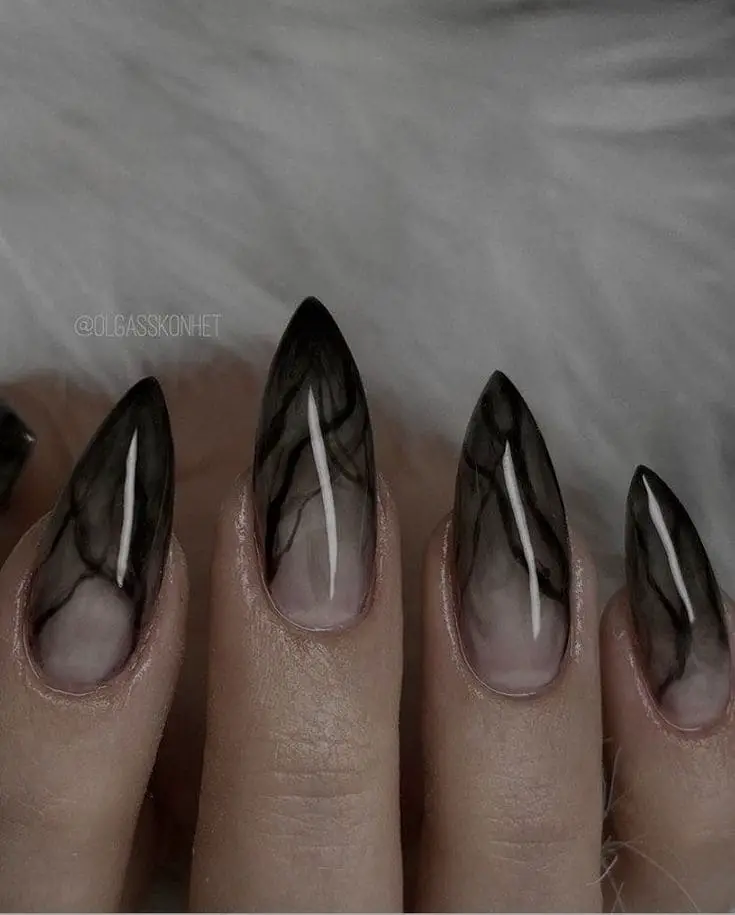
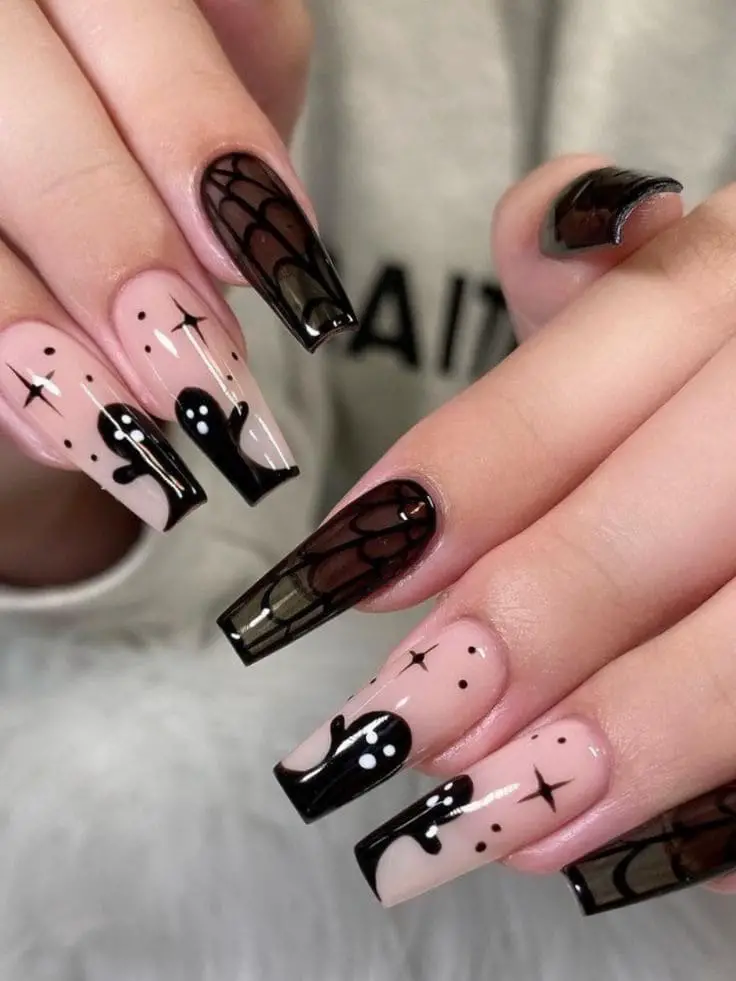
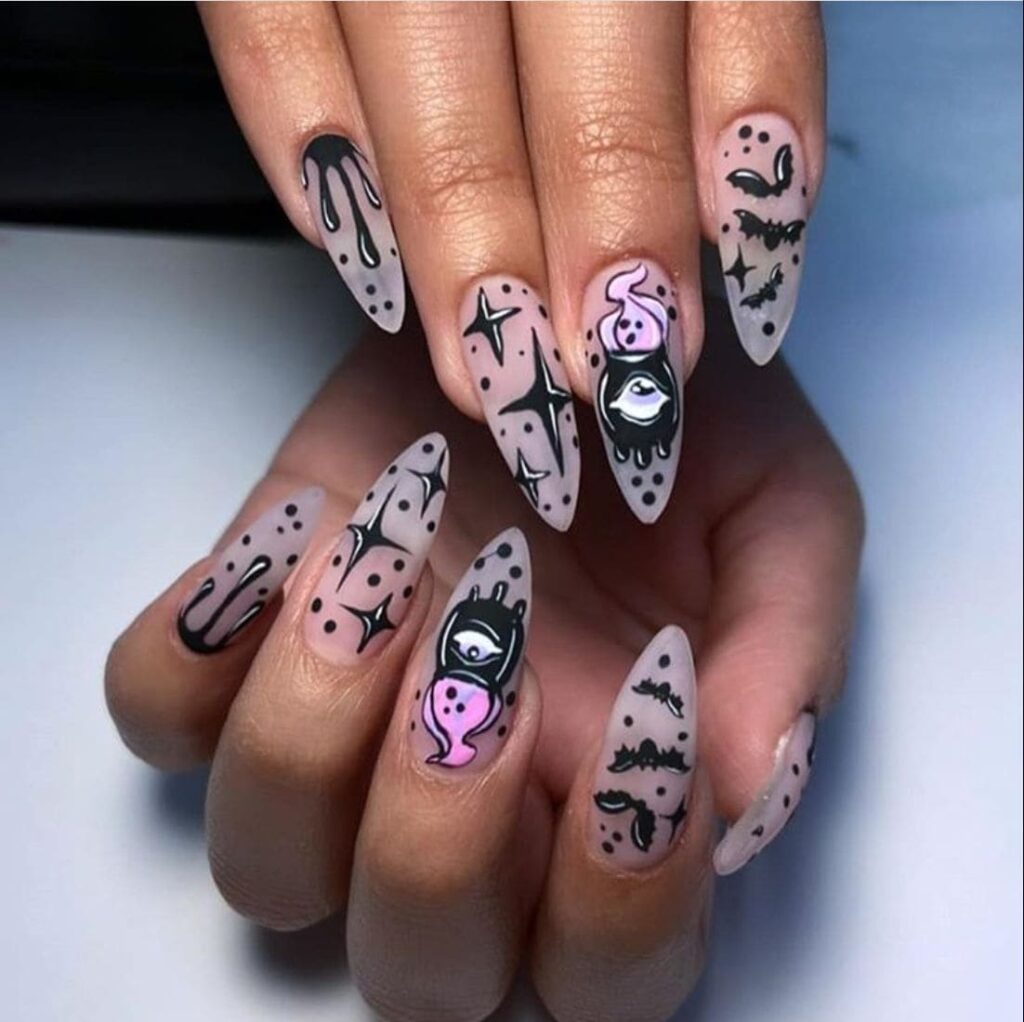
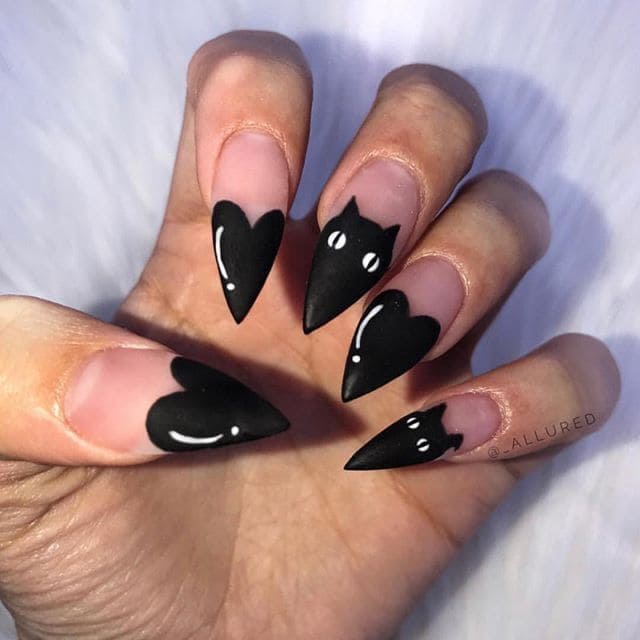
2. Gothic And Dark Nail Designs For Halloween
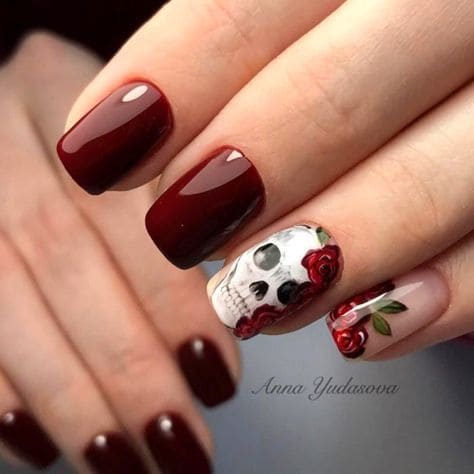
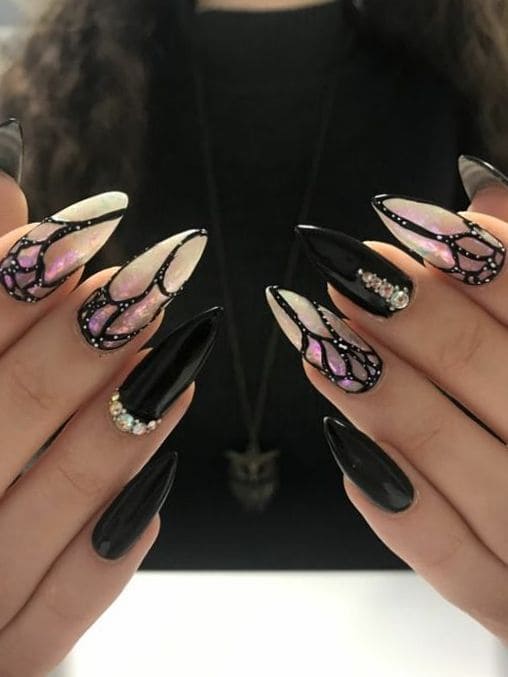
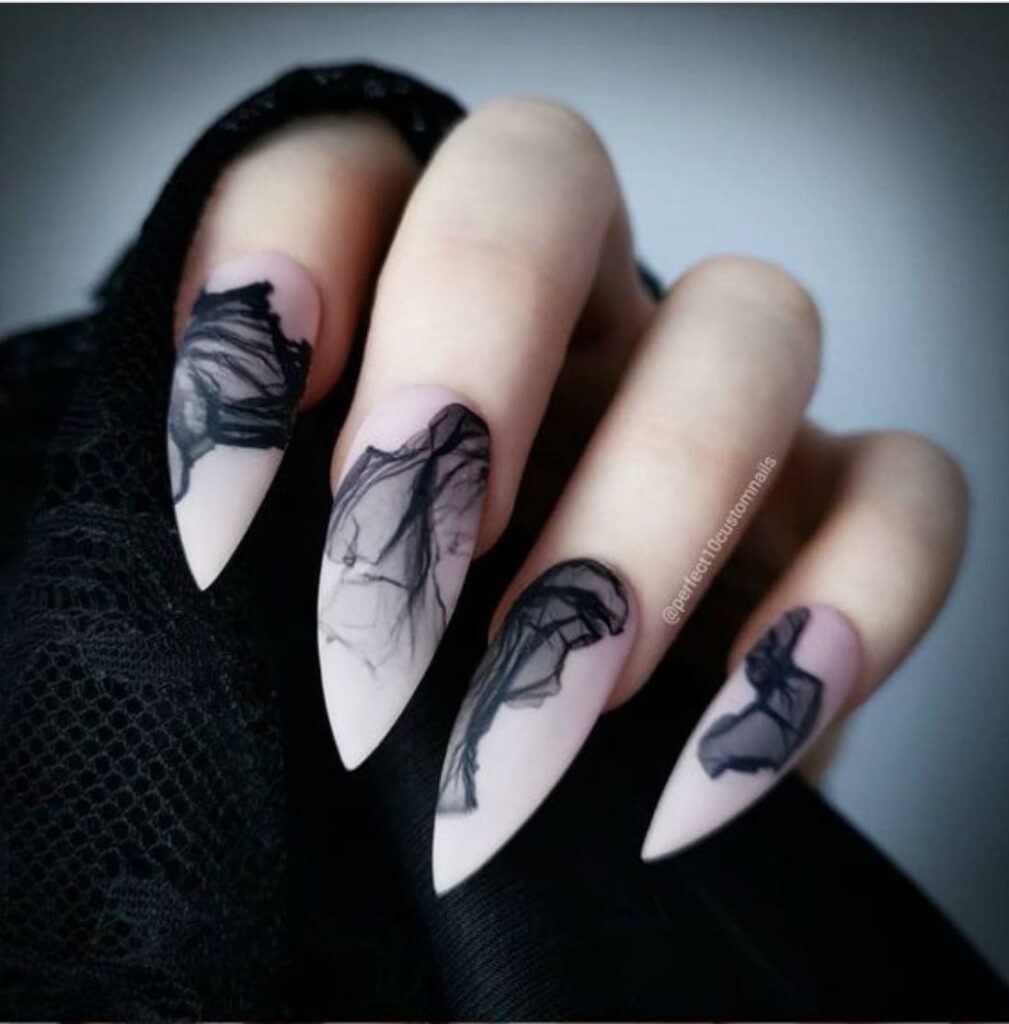
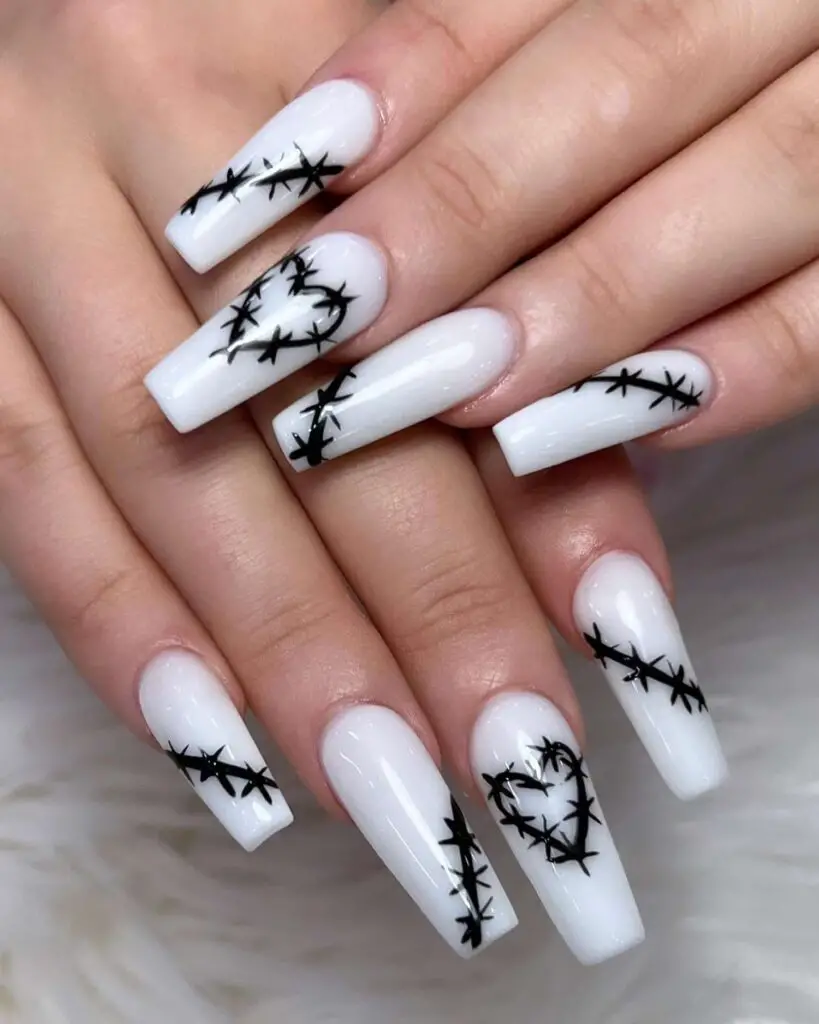
The allure of gothic aesthetics lies in its ability to infuse an air of mystery, sophistication, and sometimes, a touch of darkness. When translating this allure into Halloween nails , I aim to capture the essence of this style while maintaining an elegant and hauntingly beautiful appeal.
Suggestions for Achieving Elegant Yet Eerie Nail Looks
a. Monochromatic Magic
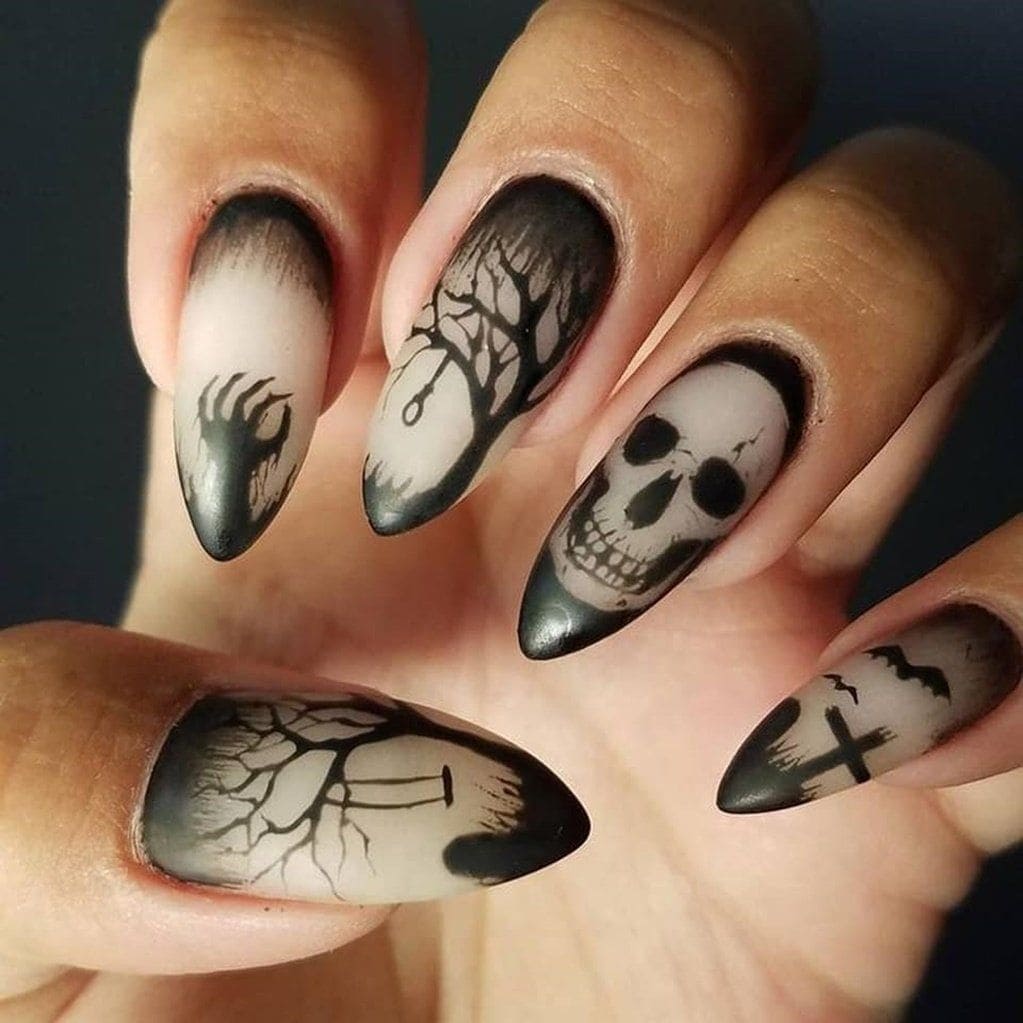
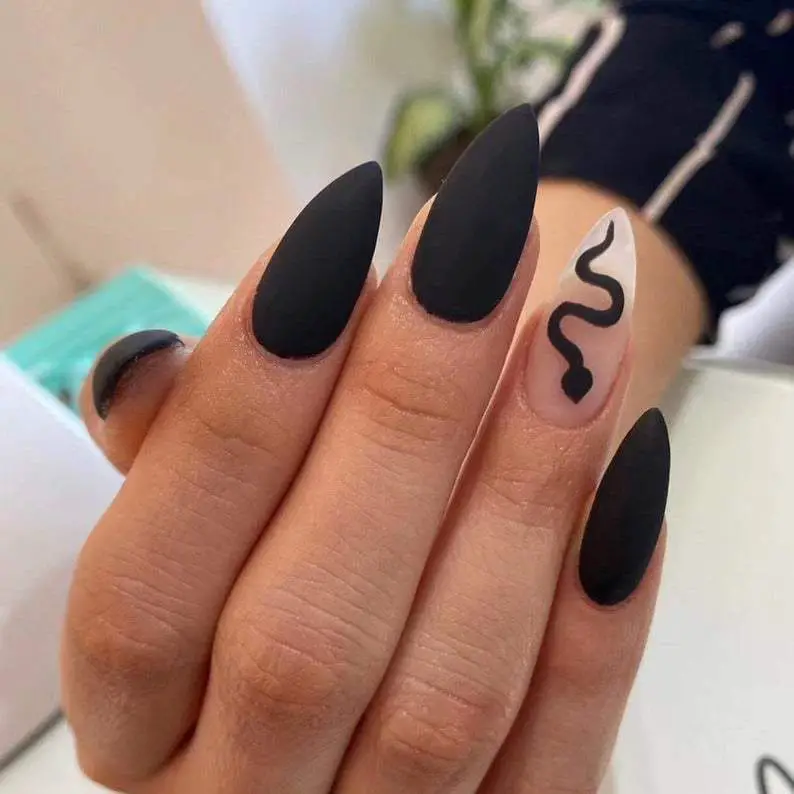
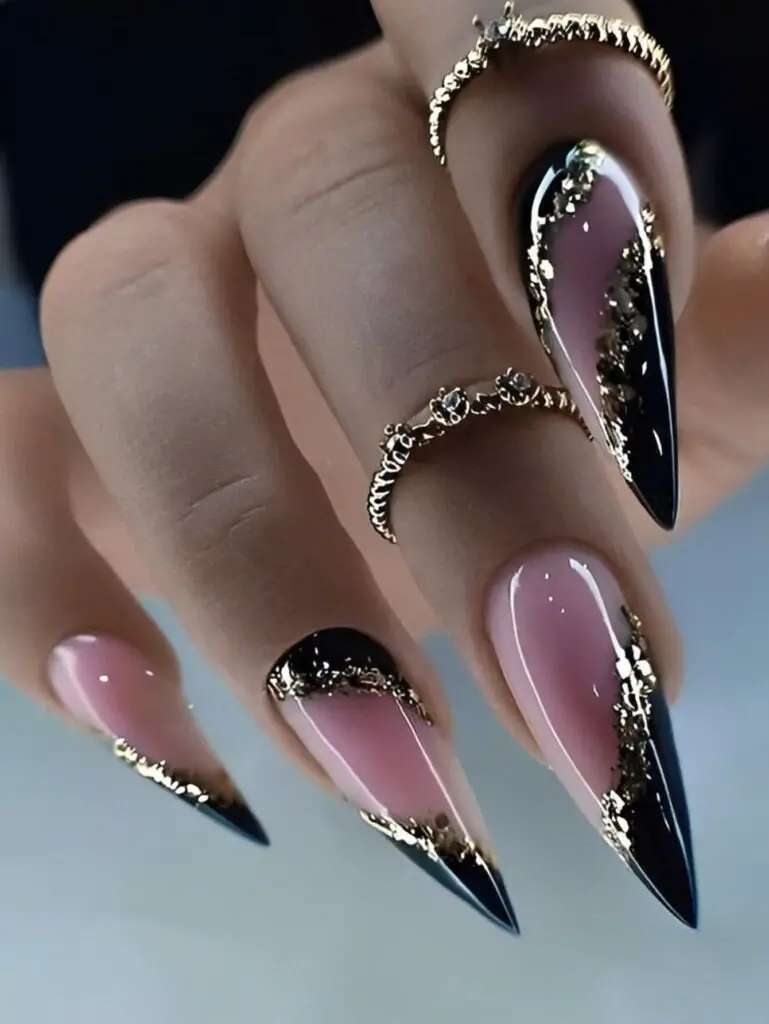
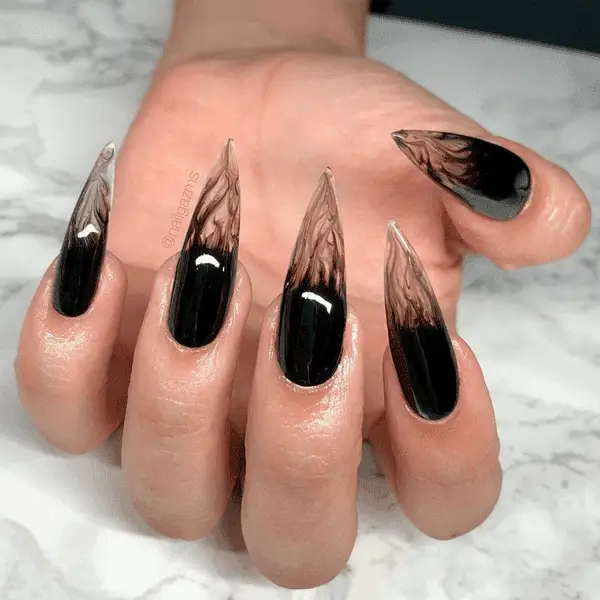
To achieve an elegant yet eerie vibe, I gravitate towards monochromatic color schemes. Rich blacks, deep purples, velvety blues, and intense grays serve as the foundation. These shades set the mood and provide a sense of depth to the design.
b. Intricate Patterns and Details
Incorporating intricate patterns is key to achieving the desired gothic effect. I experiment with delicate lace-like motifs, ornate filigree, and baroque-inspired designs. These patterns add a layer of complexity and a sense of opulence to the nail art.
c. Negative Space Elements
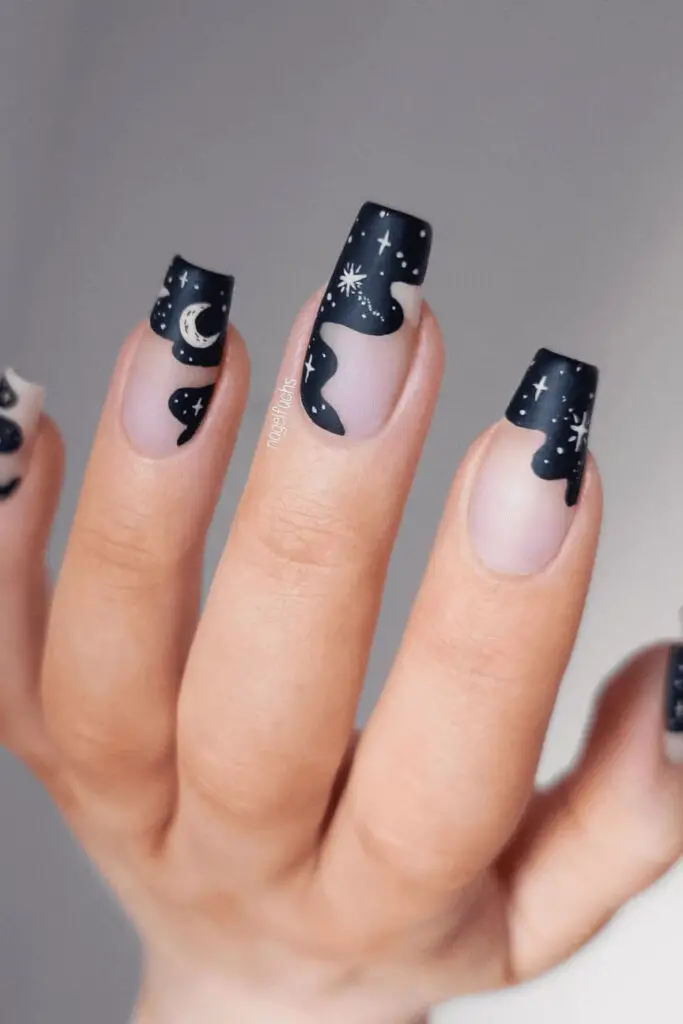
Embracing negative space in the design creates a balance between darkness and elegance. By leaving sections of the natural Halloween nails exposed, I introduce an element of contrast that enhances the overall aesthetic.
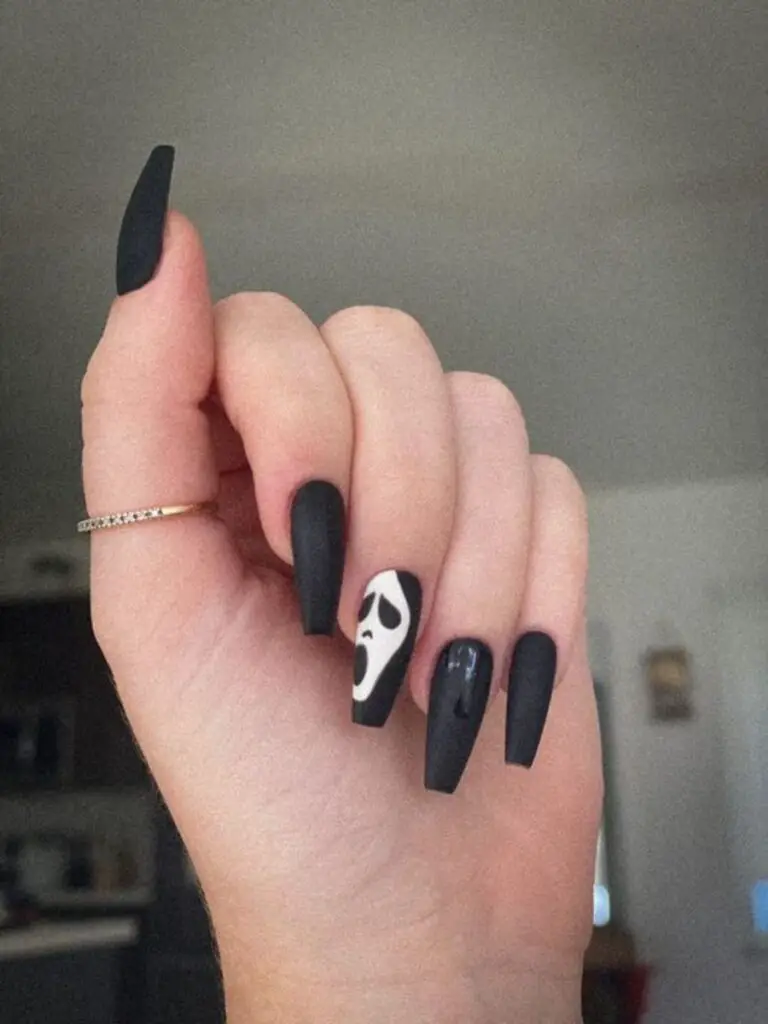
d. Matte Finishes
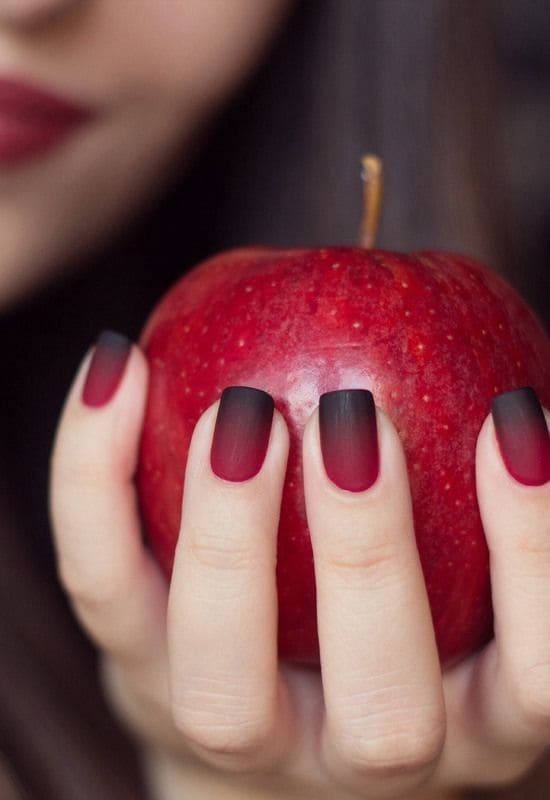
A matte finish is a go-to for gothic nail designs. It adds an understated yet luxurious texture to the nails. Alternatively, I might incorporate glossy accents strategically to create visual interest and dimension.
e. Jewel Embellishments
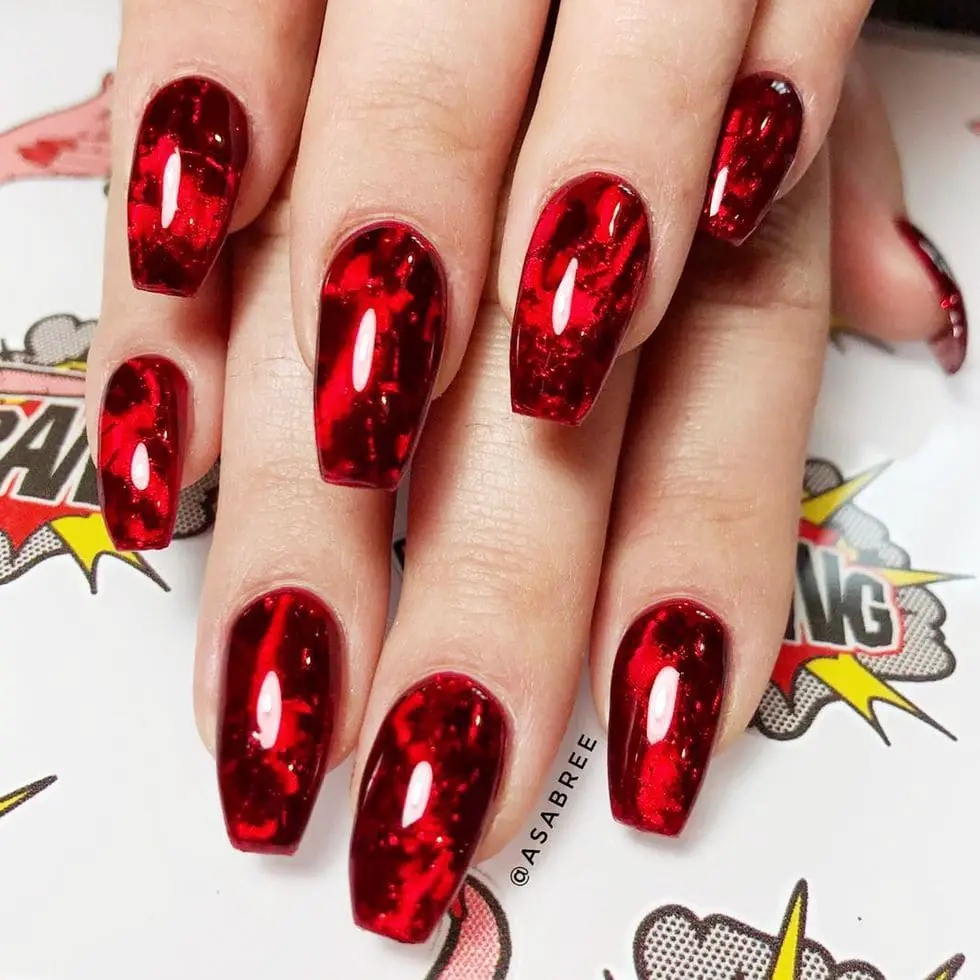
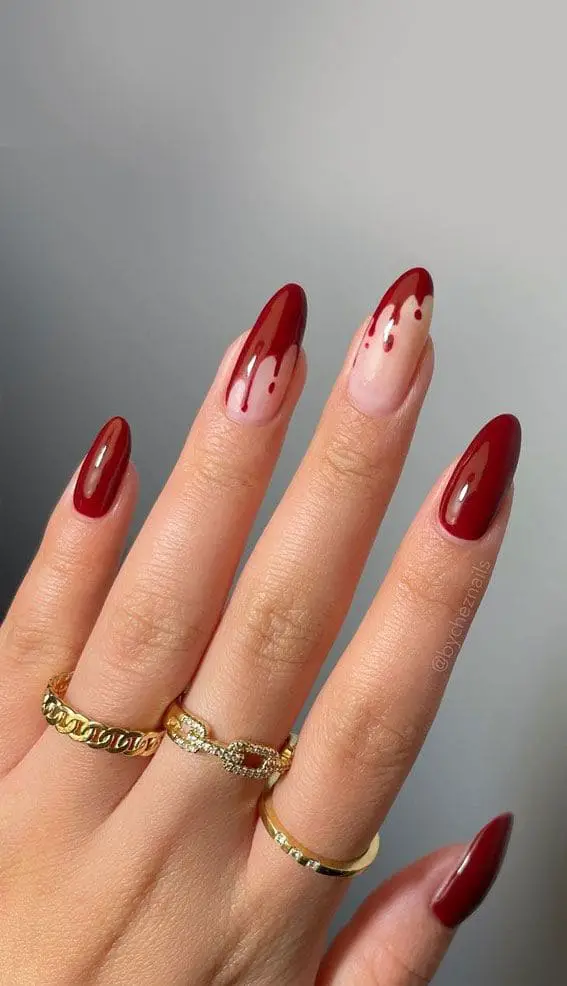
Deep jewel tones like burgundy, emerald, and sapphire play well with gothic themes. I often adorn the nails with tiny jewel embellishments or rhinestones, placing them strategically to mimic precious gemstones.
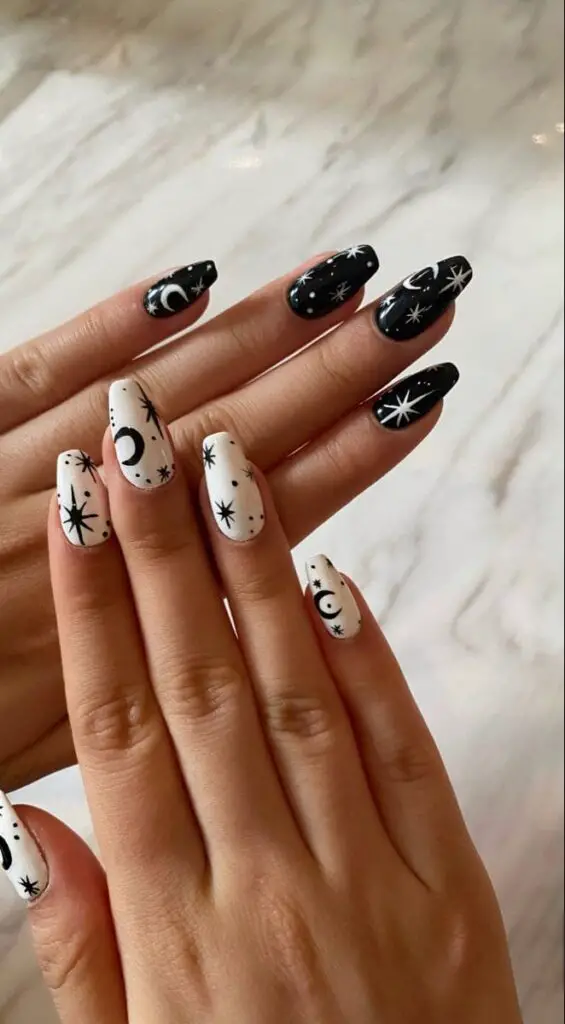
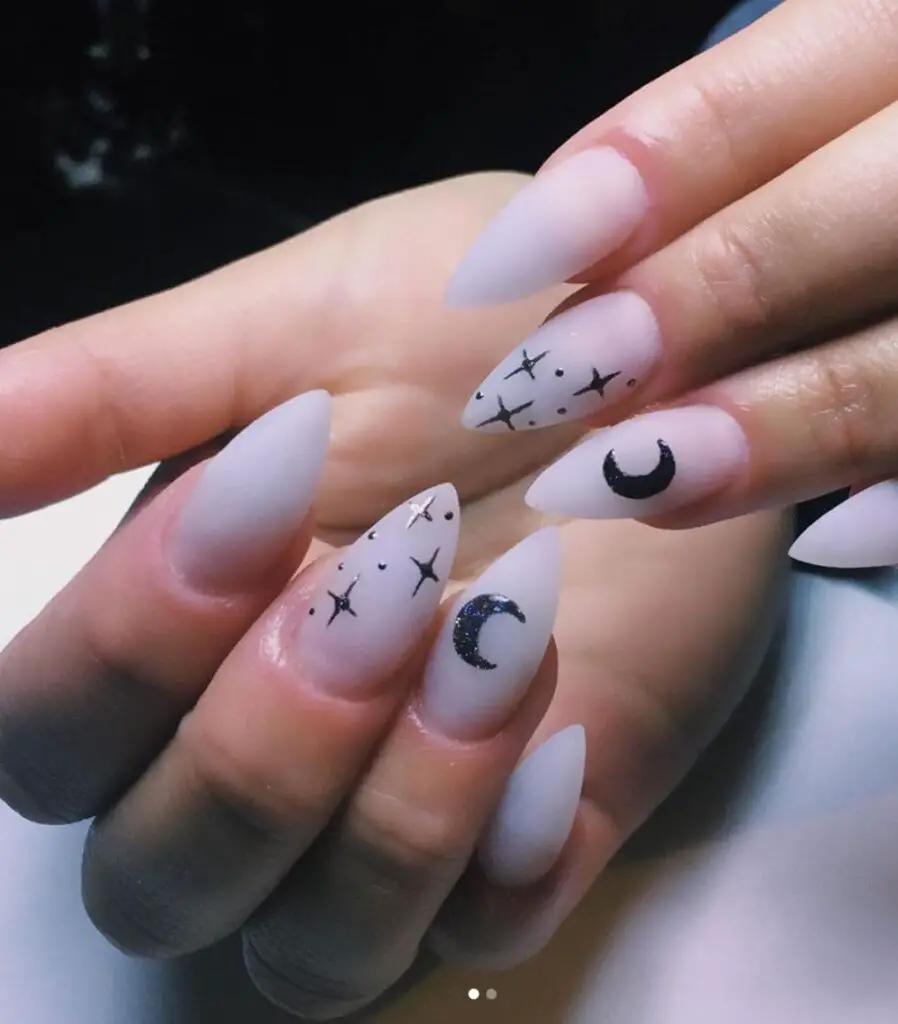
f. Moonlit Accents
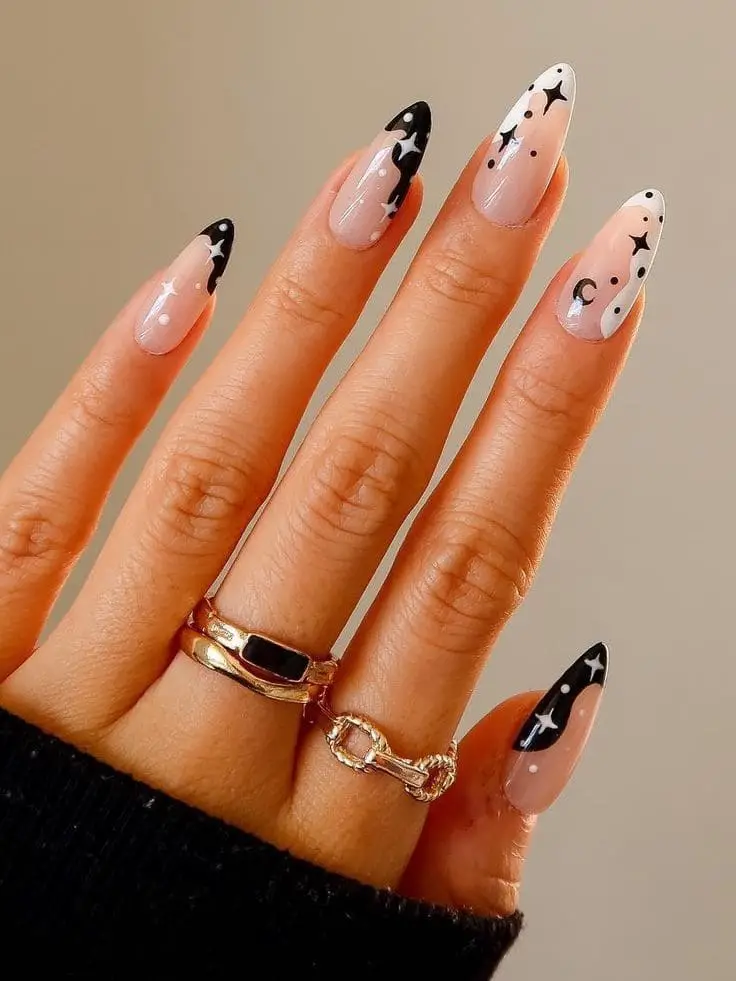
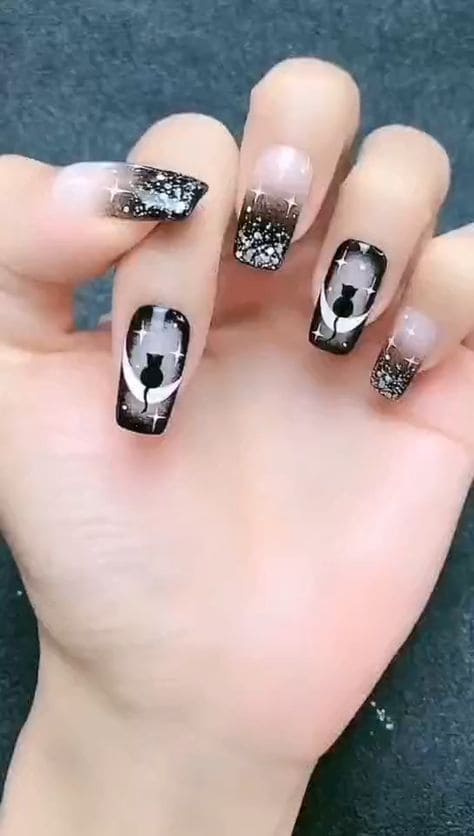
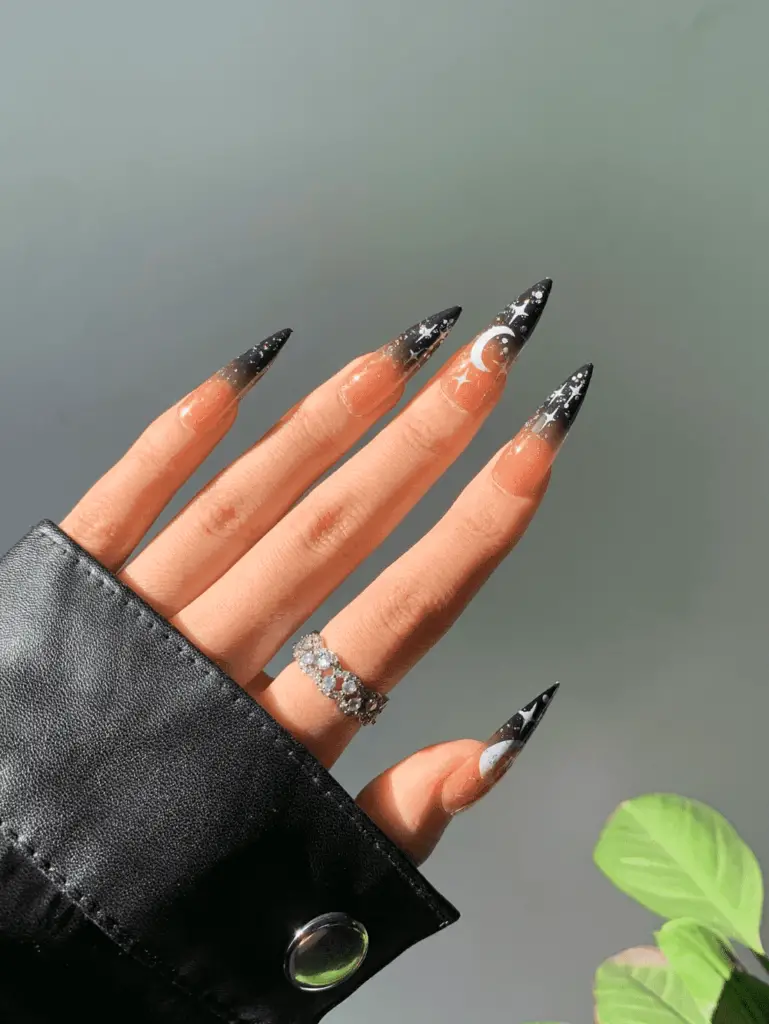
Moon and star accents in metallic hues like silver or gunmetal provide a celestial touch. These elements create a sense of otherworldly magic that resonates with the gothic aesthetic.
g. Elegantly Eerie Portraits
Incorporating portraits of mysterious figures, dark creatures, or silhouettes adds a hauntingly beautiful narrative to the design. These portraits can be achieved through detailed hand-painting or nail stamping techniques.
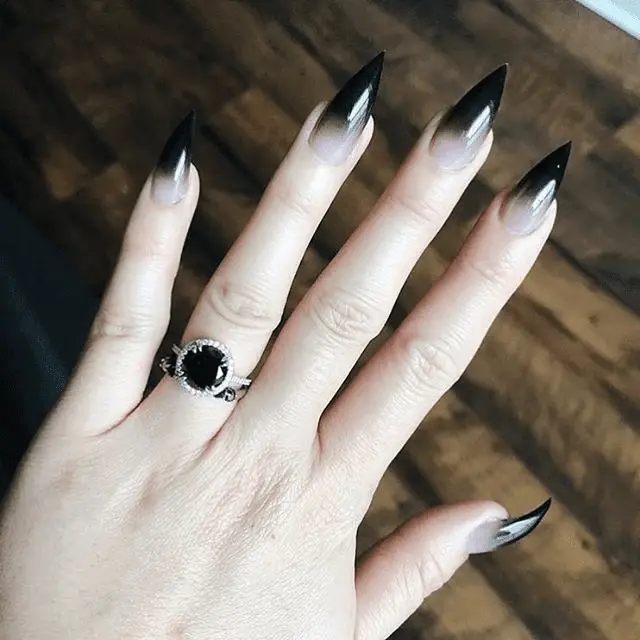
h. Subtle Gradients
Gradual transitions from one dark shade to another can evoke a sense of depth and movement. I might blend deep blacks into rich purples or smoky grays to achieve this effect.
i. Artistic Accent Nails
Selecting one nail as the accent canvas allows for more intricate detailing. It’s an opportunity to showcase a centerpiece design, whether it’s a delicately drawn raven, a Victorian cameo, or a thorny rose.
j. Delicate Chains and Charms
Adding tiny chain accents or delicate charms to the nails enhances the texture and adds a touch of the unconventional, aligning perfectly with the gothic theme.
Gothic and dark nail designs offer a captivating canvas for expressing both elegance and eerie allure. Through the meticulous interplay of dark color palettes, intricate patterns, and carefully chosen elements, I endeavor to craft Halloween nails that resonates with the enigmatic beauty of this aesthetic. Each stroke of the brush, each embellishment, contributes to a larger narrative that encapsulates the haunting essence of Halloween.

3. Horror Movie-Inspired Halloween Nails
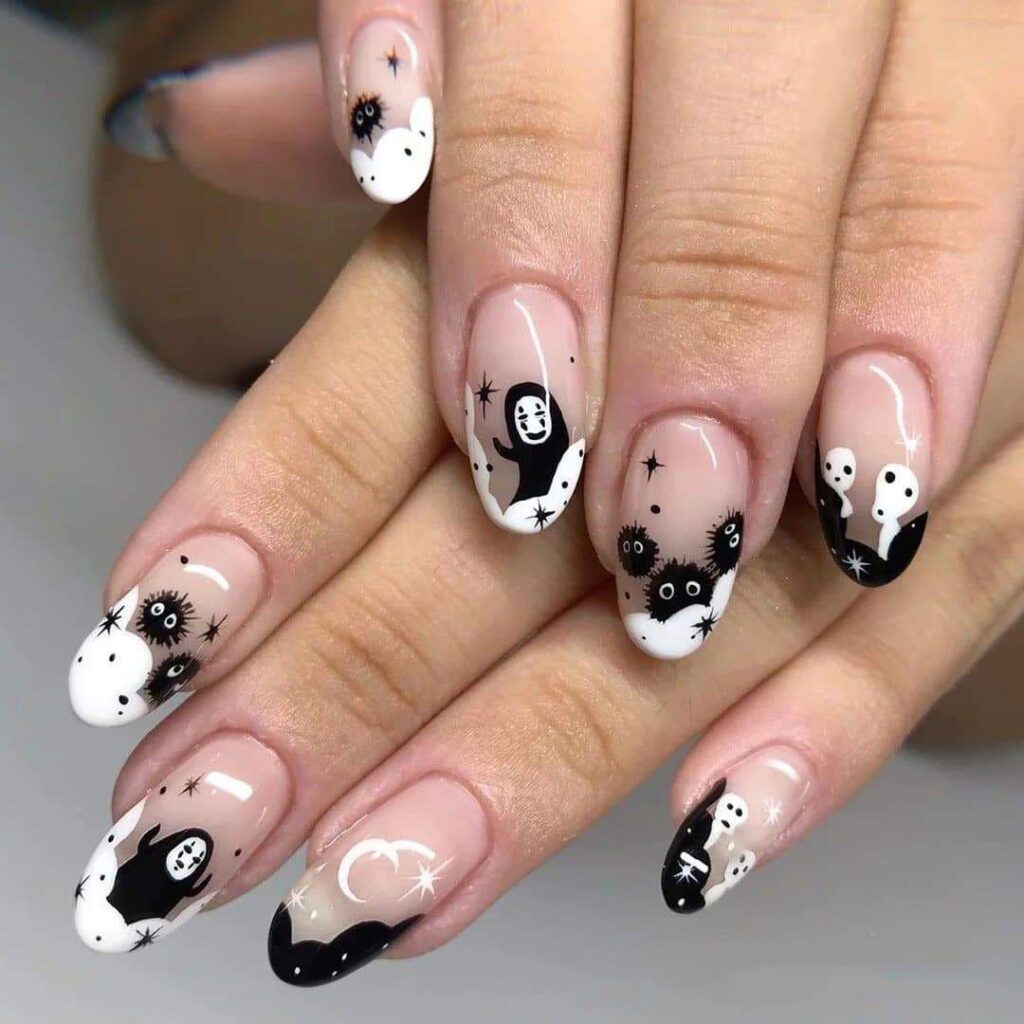
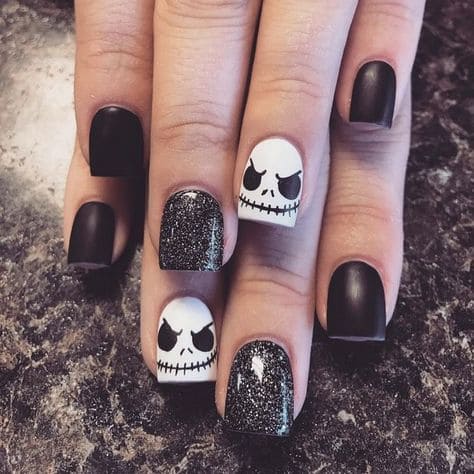
Let’s dive into the realm of horror movie-inspired nail art, where the iconic imagery of films like “The Nightmare Before Christmas,” “Friday the 13th,” and “Halloween” comes alive on your fingertips. As a dedicated nail art enthusiast, I’m truly excited to guide you through the art of translating the essence of these cinematic classics into captivating nail designs.
Horror movies have a unique ability to evoke emotions, and our canvas is the perfect medium to channel their essence. By highlighting nail art inspired by these cinematic gems, we pay homage to their storytelling and atmospheres.
a. The Nightmare Before Christmas
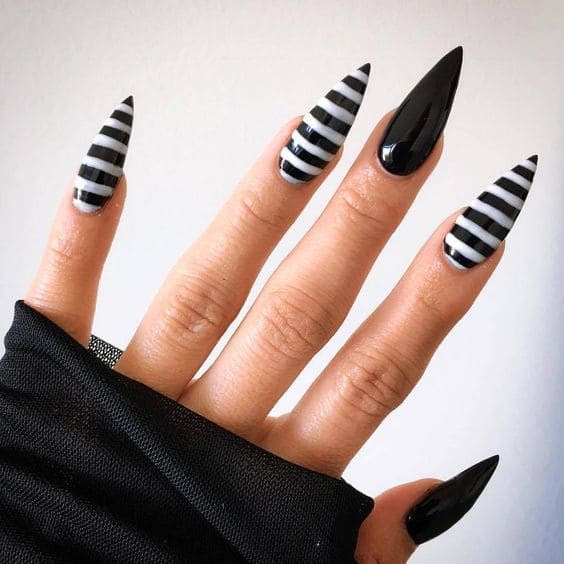
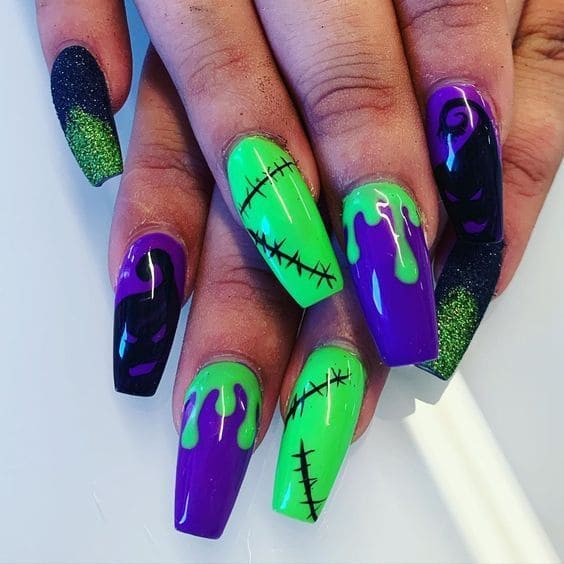
This stop-motion masterpiece blends Halloween and Christmas themes. To capture its essence, I might use dark backgrounds to represent Halloween Town and accentuate them with Jack Skellington’s iconic pinstripe suit patterns. The contrast between Jack’s face and his suit is essential, as is the whimsical yet eerie feel that Tim Burton’s creation embodies.
b. Friday the 13th
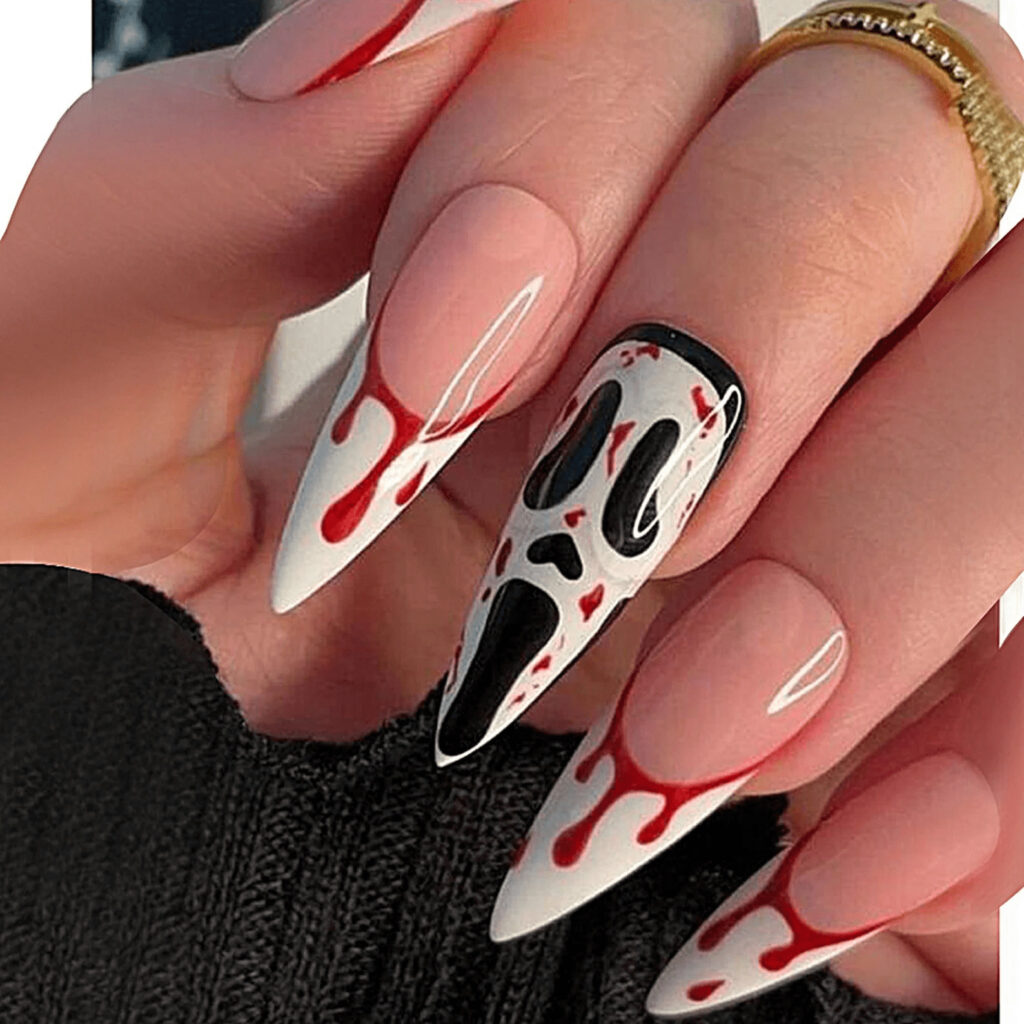
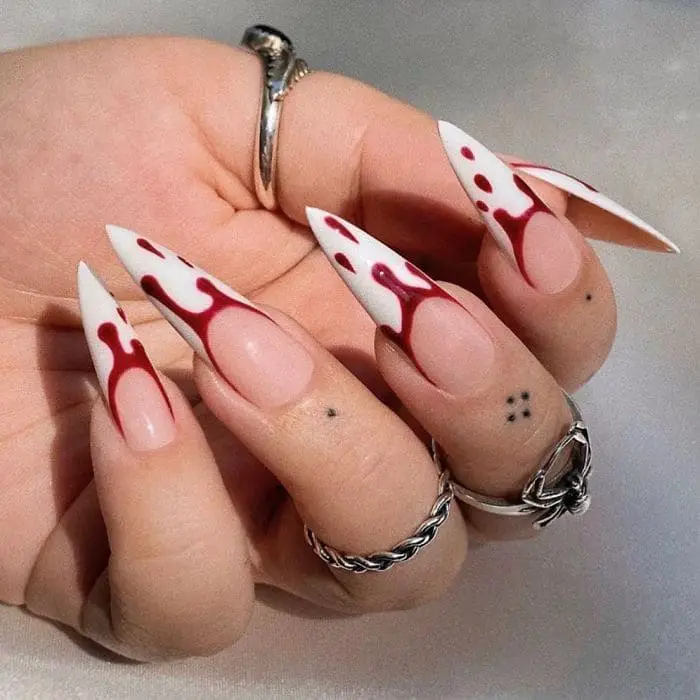
To bring this classic slasher film to your nails, I’d focus on the hockey mask worn by Jason Voorhees. Utilizing negative space techniques, I’d create the mask’s silhouette against a blood-spattered backdrop. The tension and suspense of the movie can be echoed through the careful placement of asymmetrical elements.
c. Halloween
The film that defined the slasher genre calls for a portrayal of Michael Myers‘ chilling mask. Achieving this might involve meticulously painting the white mask over a deep, haunting black base. Emphasizing the stark contrast between the mask’s blank expression and the darkness surrounding it encapsulates the film’s tension.
By meticulously infusing the essence of these films into Halloween nails, we evoke emotions, pay homage to cinematic artistry, and create a unique and engaging conversation piece. It’s a collaborative fusion of visual storytelling that truly encapsulates the magic of horror movies on a miniaturized canvas in the form of nails.
4. Cute and whimsical Halloween nail designs
Cute and whimsical Halloween nails offers a charming way to celebrate Halloween with a touch of joy and creativity. By incorporating elements like cheerful pumpkins, endearing monsters, and the sweet allure of candy corn, we’ll transform your nails into a canvas of festive delight.
Step-by-Step Guide for Creating Lighthearted and Fun Looks
- Smiling Pumpkins
Start with a warm orange base coat to capture the essence of pumpkins. Follow these steps to bring these cheerful gourds to life:
- Using a fine brush, paint pumpkin shapes on each nail, leaving a small space at the cuticle.
- Add playful faces with tiny black eyes and grinning mouths.
iii. Highlight with a white dot on each eye for a spark of life.
- Finish with a clear top coat to seal in the joviality.
- Adorable Monsters
Embrace vibrant colors and whimsical shapes to create charming monster-themed nails:
- Apply a pastel base coat, such as mint green or baby blue, for a cute backdrop.
- Paint different-sized blobs on each nail using contrasting colors to represent the monsters’ bodies.
iii. Use a dotting tool to add large eyes with white irises and black pupils.
- Finish by adding a few dots for freckles and a simple smile.
- Seal your creation with a glossy top coat to enhance the cuteness.
- Candy Corn Magic
Capture the essence of this iconic Halloween treat with the following steps:
- Apply a white base coat to make the candy corn colors pop.
- Using tape or nail vinyls, section off the nail into three parts: yellow at the base, orange in the middle, and white at the tip.
iii. Paint each section its respective color, ensuring clean lines.
- Once dry, remove the tape or vinyls.
- Seal the design with a clear top coat to enhance its vibrancy and protect your art.
These step-by-step guides allow you to infuse a sense of playfulness into your Halloween nail art. With cheerful pumpkins, adorable monsters, and the iconic candy corn, your nails will become a celebration of the holiday’s joyous spirit. Let your creativity flow and embrace the whimsy!

5. Glow-In-The-Dark Halloween Nail Art
Glow-in-the-dark nail art has gained remarkable popularity, allowing us to embrace the allure of the supernatural. This trend provides a magical transformation that’s particularly fitting for Halloween, as it adds an element of mystery and excitement to your manicure. When the lights go out, these designs come to life, creating an unforgettable visual experience.
a. Choosing the Right Nail Polish
Opt for high-quality glow-in-the-dark nail polishes. These polishes contain phosphors that absorb light and emit it when in the dark. To enhance the effect, apply a white base coat before using the glow-in-the-dark polish. This helps the color of the Halloween nails appear more vibrant and true to its hue.
b. Charging the Glow
Before you unveil the glowing effect, charge the polish under a bright light source. Natural sunlight or a UV lamp works wonders in charging the phosphors. The longer you charge, the more intense the glow will be. This step is essential for achieving a captivating luminosity.
c. Designing with Precision
Consider your design’s composition, as glow-in-the-dark elements can be focal points or accents. Intricate patterns and detailed designs tend to showcase the glowing effect better. You might incorporate stars, moons, or intricate silhouettes to enhance the otherworldly allure.
d. Combining Glow with Regular Nail Polish
Mix and match your glow-in-the-dark design with regular nail polish for added contrast. Creating a gradient or combining it with matte or glossy finishes can elevate the visual impact of your Halloween nails.
e. Sealing the Design
Seal your glow-in-the-dark masterpiece with a clear top coat to protect the design and ensure a longer-lasting glow. A water-based top coat is recommended, as it preserves the glow effect better than oil-based ones.
f. Experimenting with Nail Art Techniques
Glow-in-the-dark nail art can be combined with various techniques such as stamping, hand-painting, or using nail decals. These techniques allow you to customize your design and create intricate details that come alive in the dark.
Incorporating glow-in-the-dark elements into your Halloween nail art opens a realm of creativity and intrigue. The ability to transition from day to night with a burst of radiant luminosity adds an element of surprise to your manicure. Whether you’re opting for subtle accents or bold designs, the glow-in-the-dark trend will undoubtedly make your Halloween nails an unforgettable experience for both you and those around you.
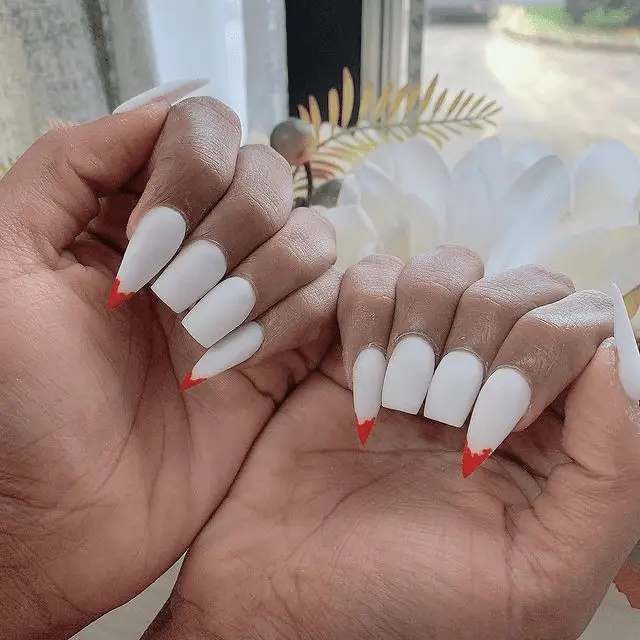
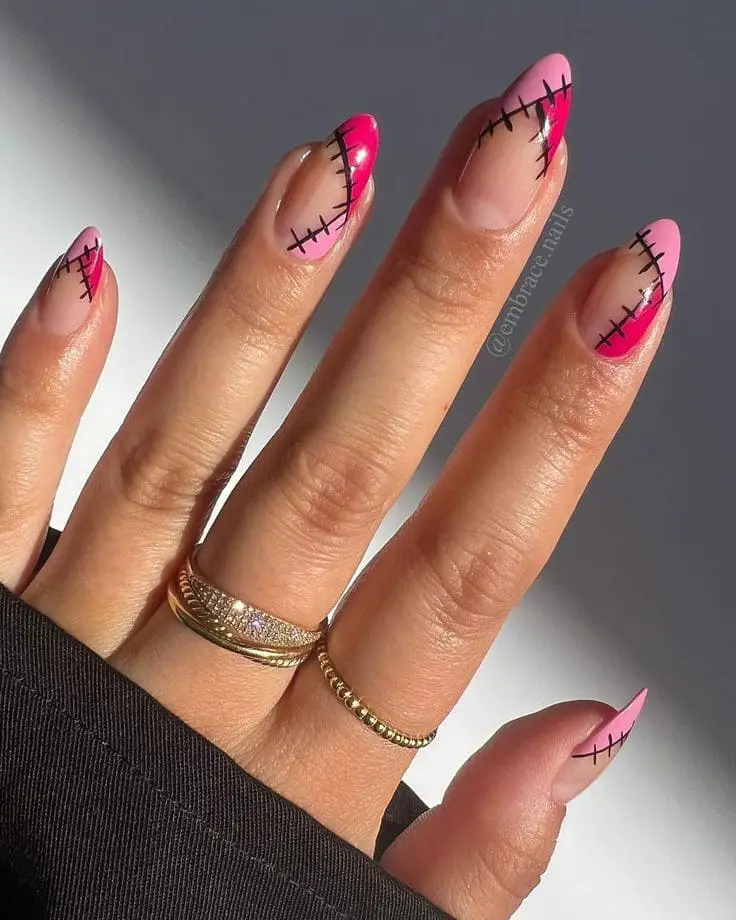
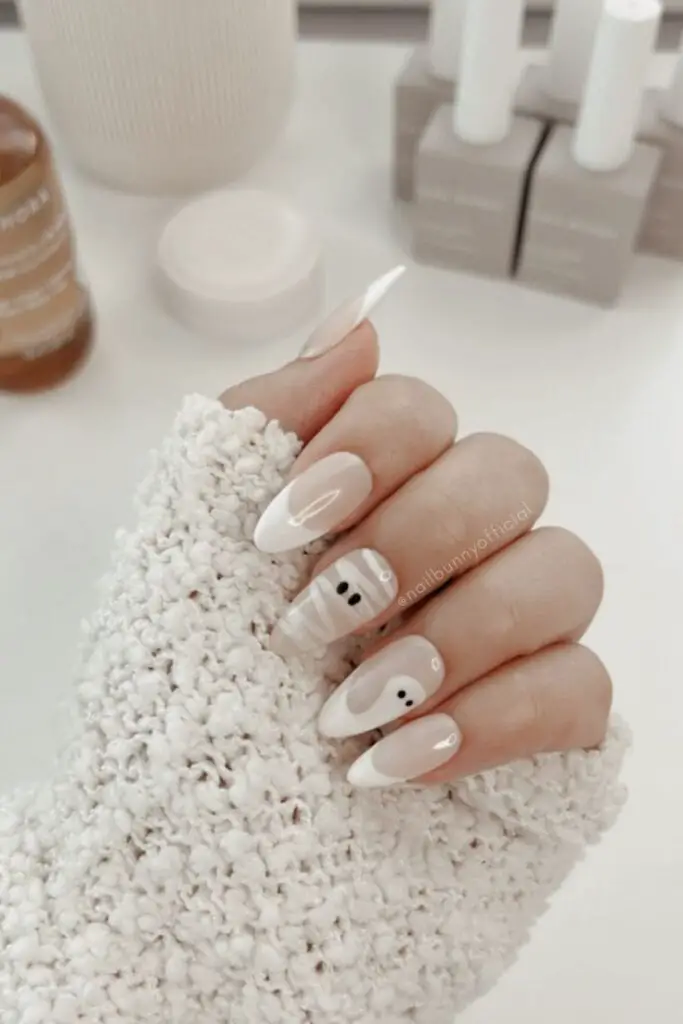
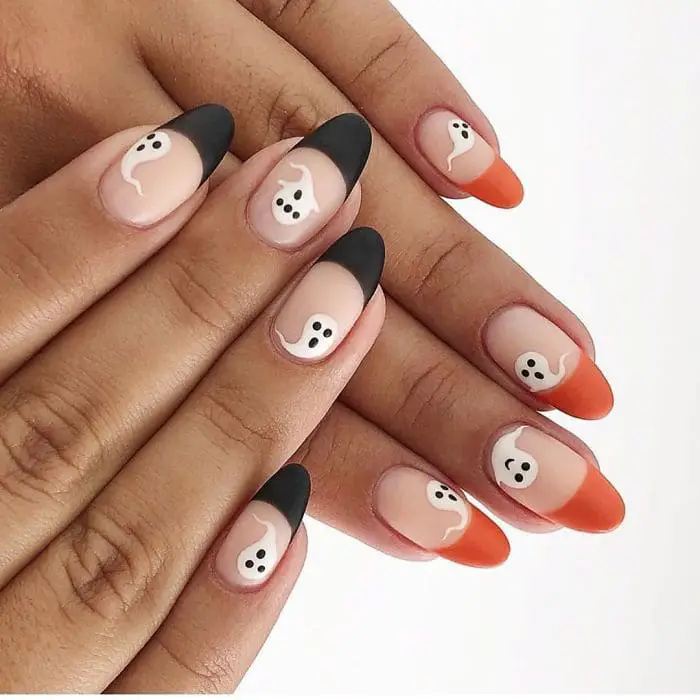


6. Haunted Mansion-Inspired Nail Art
Haunted mansion-inspired nail art encapsulates the otherworldly atmosphere of abandoned dwellings and the chilling narratives they evoke. By delving into this theme, we can create nail designs that tell stories of forgotten places and mysterious energies.
a. Gradients and Moody Colors
Begin by selecting a color palette that captures the mood of haunted mansions. Deep, moody shades like dark purples, mysterious grays, and midnight blues set the stage for your design. Experiment with gradient techniques that transition from lighter to darker shades, evoking the shadows of a dimly lit mansion.
b. Texture Play
Texture adds depth to your haunted mansion-inspired nails. Consider using matte top coats to create a velvety, aged effect that mimics the weathered surfaces of old buildings. Combine matte textures with glossy elements to simulate the interplay of light and shadow in a haunting setting.
c. Eerie Landscapes
Incorporate nail art that portrays eerie landscapes surrounding the mansion. For instance, you might depict a moonlit sky with wispy clouds or barren trees. These elements set the stage for the haunted narrative and enhance the overall ambiance.
d. Gothic Architecture Accents
Utilize delicate nail brushes to paint intricate gothic architectural details such as arched windows, wrought iron gates, and ornate doorways. These details add an air of sophistication to your design, reminiscent of the grandeur found in old mansions.
e. 3D Elements for Depth
Introduce 3D elements like tiny plastic spiders, bats, or mini skeleton charms. Strategically placing these elements on your Halloween nails adds depth and interactivity to the design. Nail art studs and rhinestones can also emulate the idea of aged, decorative hardware.
f. Mist and Fog Effects
Create a sense of mystery by using a fine brush to add mist or fog effects to your design. This technique softens edges and adds an element of otherworldliness, enhancing the haunted aura.
g. Creepy Silhouettes
Experiment with black silhouettes of ghostly figures, looming mansions, or eerie landscapes. These silhouettes can be painted directly onto the nail or achieved using nail stickers or stencils.
Incorporating gradients, textures, and 3D elements into your haunted mansion-inspired Halloween nails elevates your design from mere decoration to a storytelling masterpiece. By thoughtfully combining these techniques, you’ll immerse yourself and others in the eerie and captivating world of abandoned mansions and the mysteries they hold.

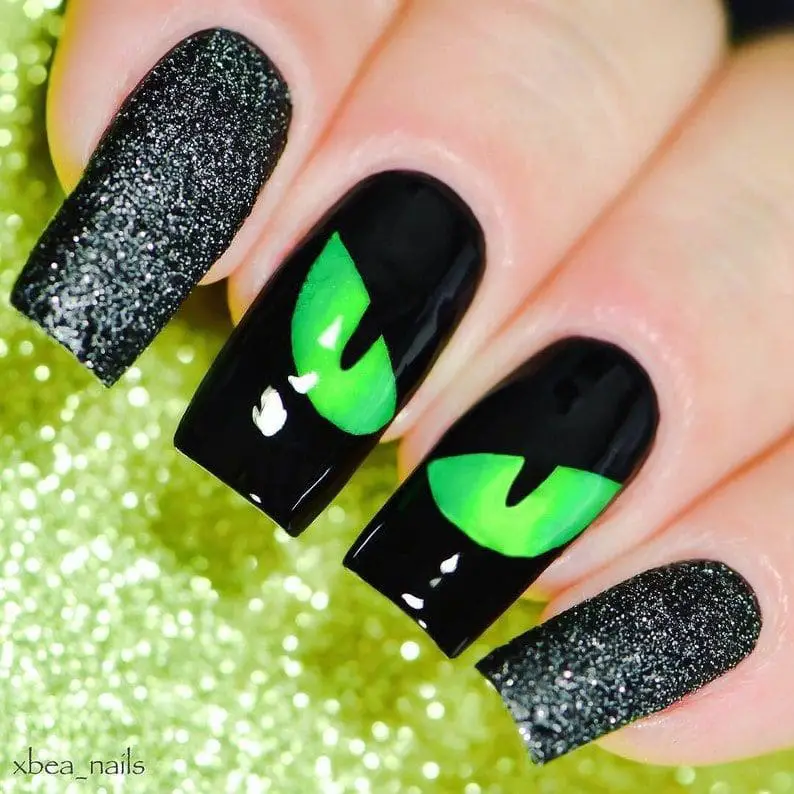
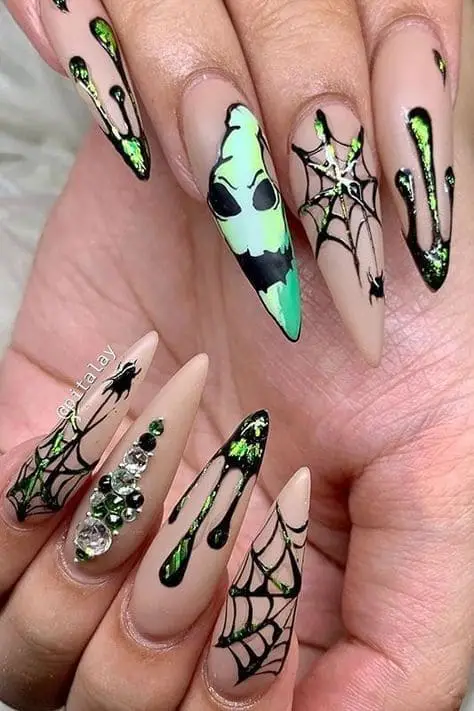


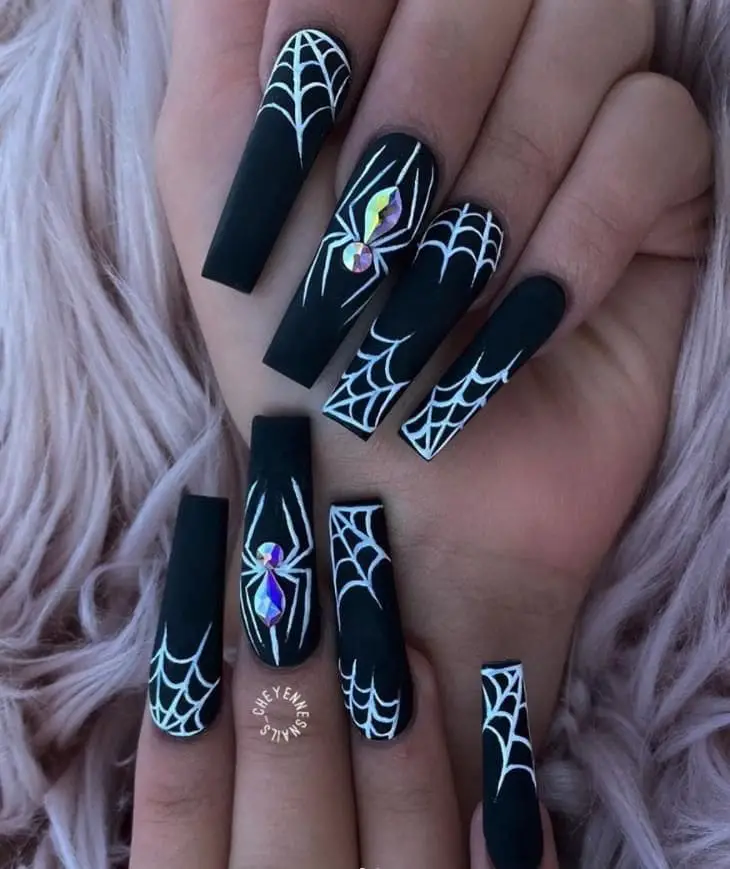

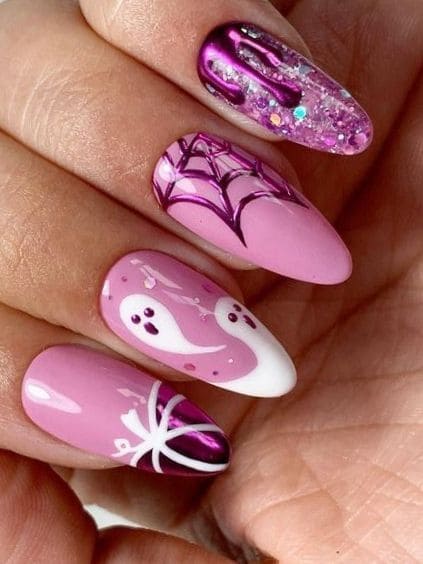

7. Witchy and Enchanted Halloween Nail Designs
Witchy and enchanted nail designs offer a captivating canvas to immerse yourself in the world of magic and mystery. By channeling the elements of witches’ covens, bewitching spells, and the enchantment of hidden forests, we can bring a touch of the supernatural to your manicure.
a. Color Palette Suggestions
Start by selecting a color palette that resonates with magical aesthetics. Deep, dark hues like rich purples, velvety blacks, and mystical midnight blues form the foundation. Complement these with accents of gold, silver, and iridescent tones that evoke the essence of spellbinding enchantment.
b. Witch’s Cauldron Magic
Use a deep, glossy black as a base coat to symbolize the cauldron. Apply holographic or shimmering top coats to mimic the bubbling and shimmering of magical concoctions. You can accentuate the design with miniature cauldron stickers or hand-painted cauldron motifs.
c. Runes and Symbols
Incorporate mystic runes, pentacles, and other symbolic elements associated with witchcraft. These can be painted delicately using fine brushes or applied using nail decals for precise detail.
d. Enchanted Forest Imagery
Capture the allure of enchanted forests by painting silhouettes of tall, gnarled trees against a twilight sky. Create depth by using gradient techniques to transition from darker to lighter shades, evoking the dappled sunlight filtering through the trees.
e. Sparkling Magic Dust
Add a touch of whimsy by incorporating iridescent glitter or shimmer to represent magical dust or fairy enchantments. Apply this over certain areas of the design or as a delicate overlay to evoke a sense of ethereal magic.
f. Mystical Gemstones
Introduce gemstone accents like amethyst or moonstone-inspired designs. These can be achieved using nail stamping plates or hand-painted details to mimic the luster and allure of precious stones.
g. Witchy Symbols and Accessories
Consider symbols like pointed hats, broomsticks, and magical wands as focal points. These elements can be portrayed in elegant silhouettes or intricate designs using contrasting colors.
By thoughtfully combining rich color palettes, symbolic motifs, and otherworldly details, you’ll create a captivating narrative that embodies the mystique of witches, magical spells, and the enchantment of hidden forests on your fingertips.

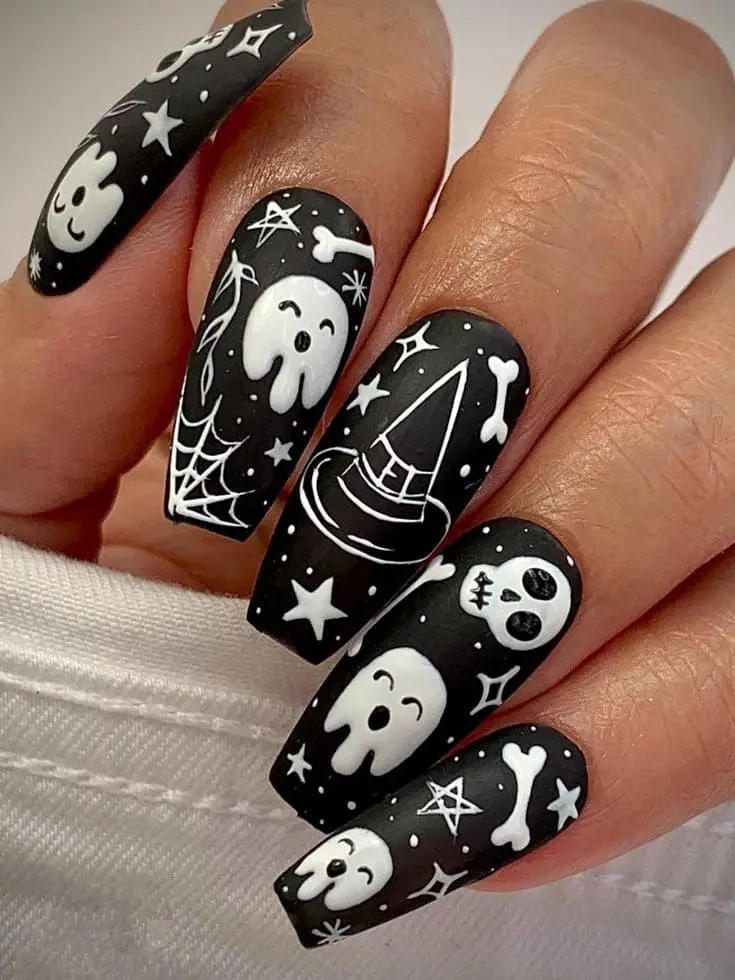
8. Zombie and Skeleton Nail Art
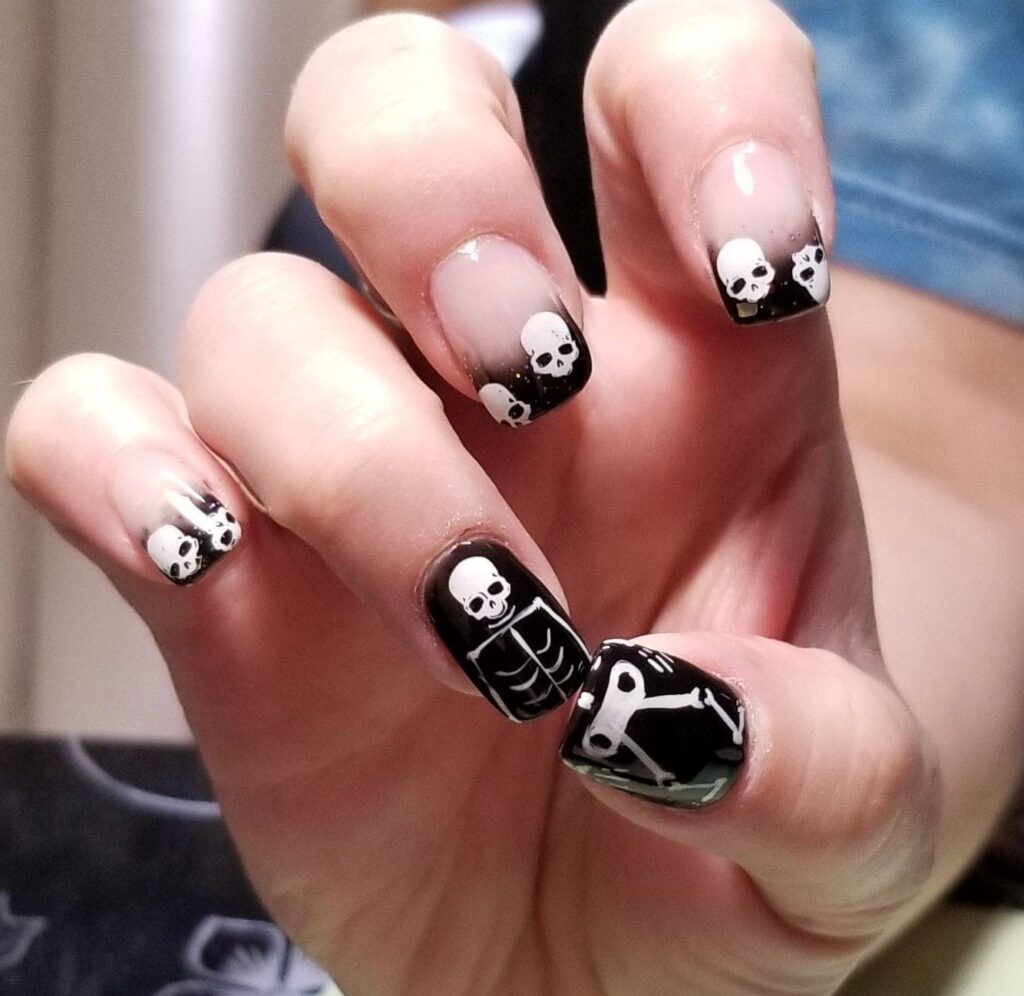
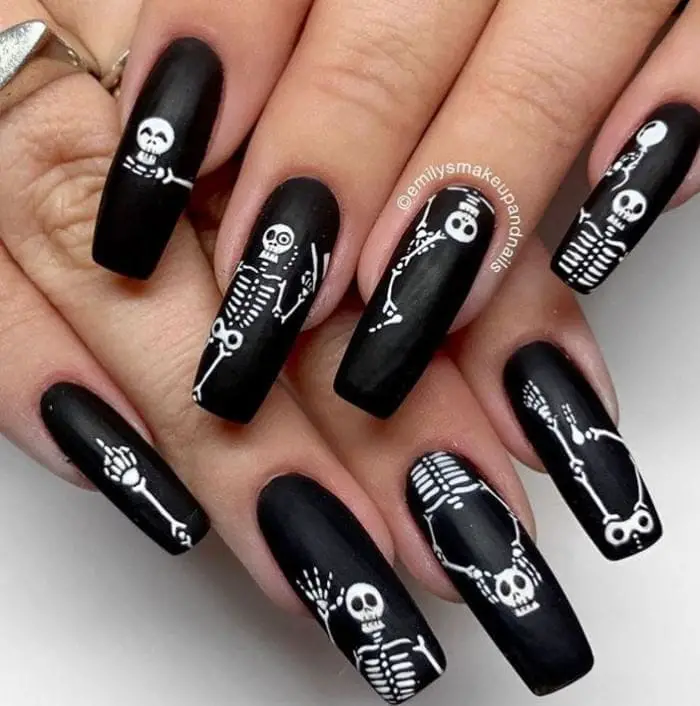
Zombie and skeleton nail art taps into the eerie and mysterious realm of the afterlife, allowing us to celebrate the spookier side of Halloween. By incorporating the visual elements of decaying flesh, exposed bones, and the unsettling aesthetic of the undead, we can create nail art that captures the essence of this theme.
Techniques for Realistic Bone Textures and Decaying Effects
a. Choosing the Right Base Colors
Start with a neutral, bone-like base color to represent the skeletal structure. This can range from pale beige to light gray. For zombie nail designs, consider using muted shades of green, gray, or brown to simulate decaying flesh.
b. Creating Bone Textures
For realistic bone textures, use a fine brush to delicately paint bone-like lines on the nails. Mimic the texture of bones by alternating between thin, straight lines and slightly curved ones to simulate the uneven surface.
c. Decaying Flesh Effects for Zombies
To create the decaying flesh effect, layer translucent green, gray, or brown polish over the base color. Use a sponge or a makeup wedge to dab the colors lightly, allowing the base color to show through for depth on your Halloween nails.
d. Enhancing Depth with Shadows
Use a darker shade of the base color or a slightly darker hue to add shadows in crevices and around bone areas. This enhances the three-dimensional illusion and adds depth to the design.
e. Adding Delicate Cracks
Paint subtle cracks in the bone texture to simulate wear and decay. These cracks can be irregular and strategically placed to achieve a natural effect.
f. Accentuating with Details
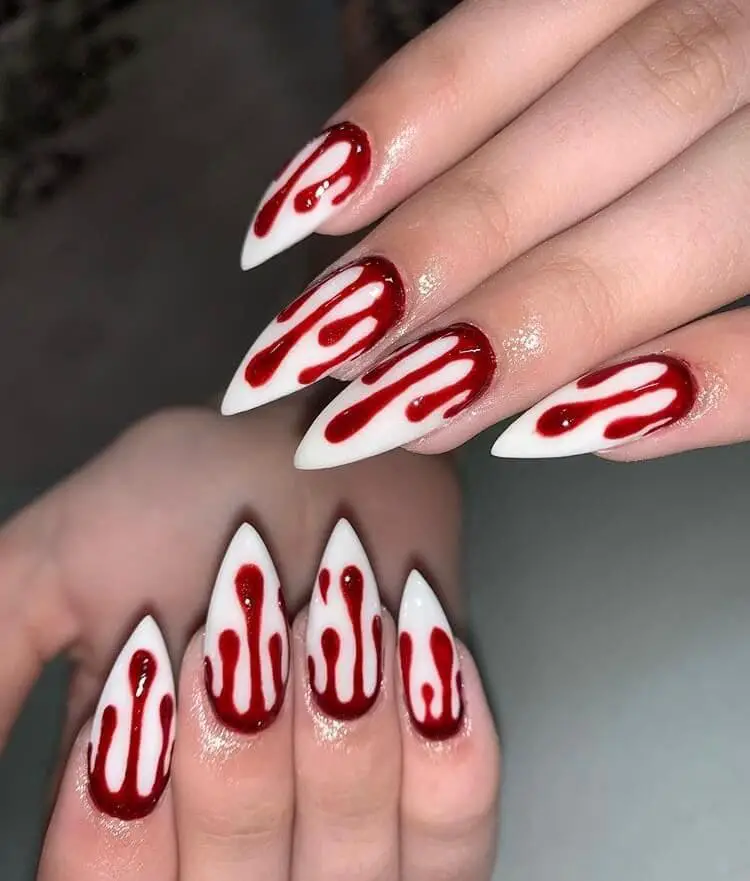
Detail the skeletal design by adding tiny dots or lines to mimic joints and connective tissues. For zombie designs, consider adding hints of gore such as drips of fake blood or exposed muscle fibers.
g. Incorporating 3D Elements
For added realism, consider using 3D elements like miniature skeleton charms or bone-shaped studs. These elements add tactile texture to your Halloween nails.
Finishing with a Matte Top Coat
To enhance the decaying and eerie aesthetic, finish your design with a matte top coat. This eliminates the glossy finish and creates a more authentic, bone-like appearance.
Using these techniques allows you to bring to life the haunting world of zombies and skeletons on your Halloween nails. By thoughtfully blending realistic bone textures with carefully created decaying effects, you’ll create a striking portrayal of the undead that captures the chilling essence of Halloween.



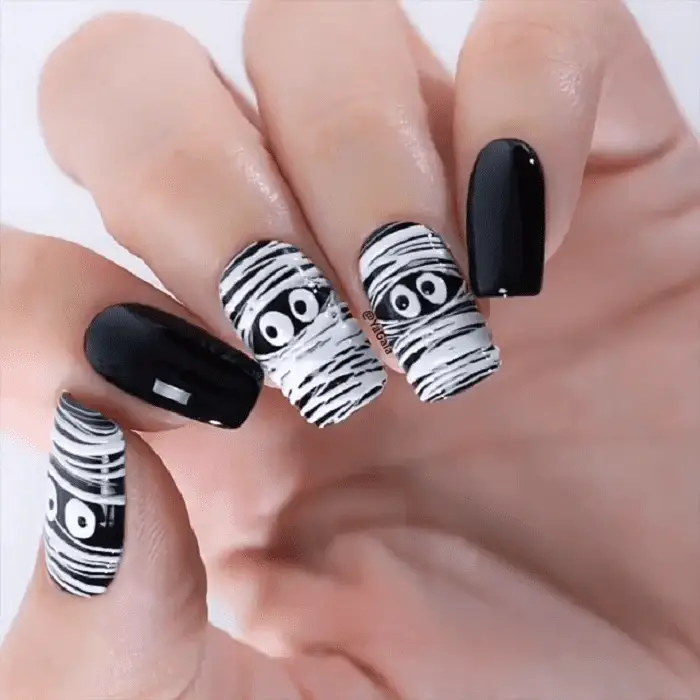


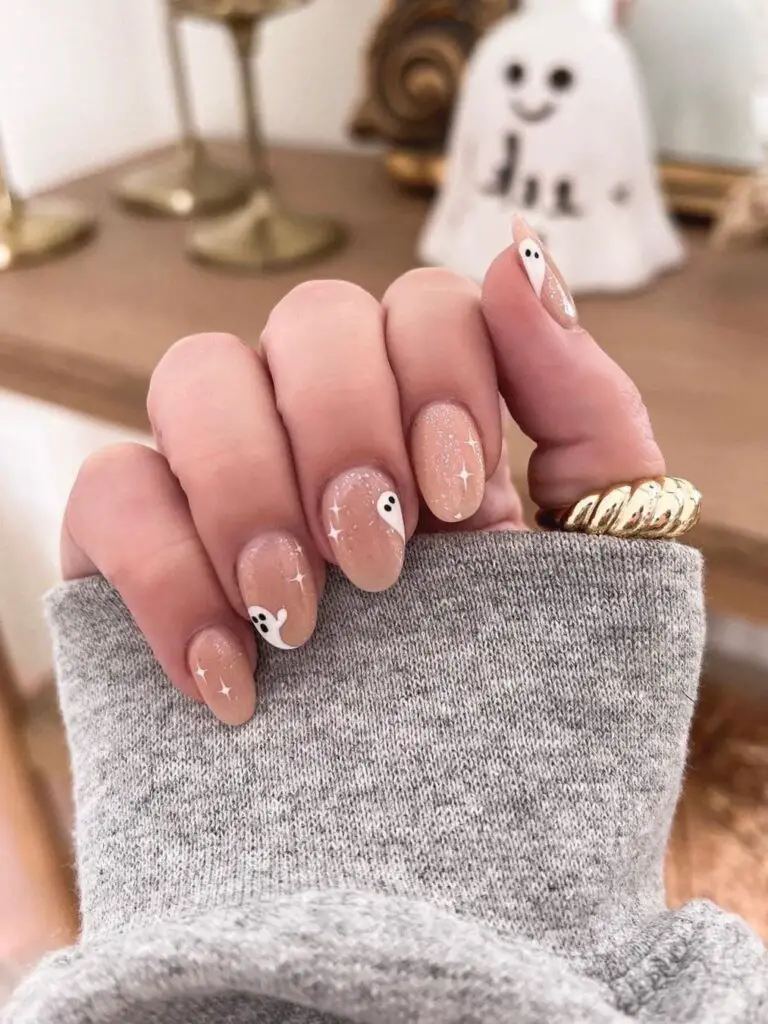
9. Exploring Pop Culture Halloween Nail Art
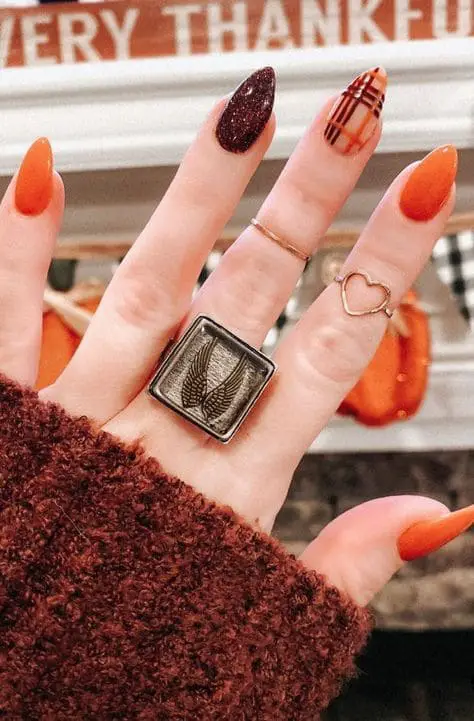
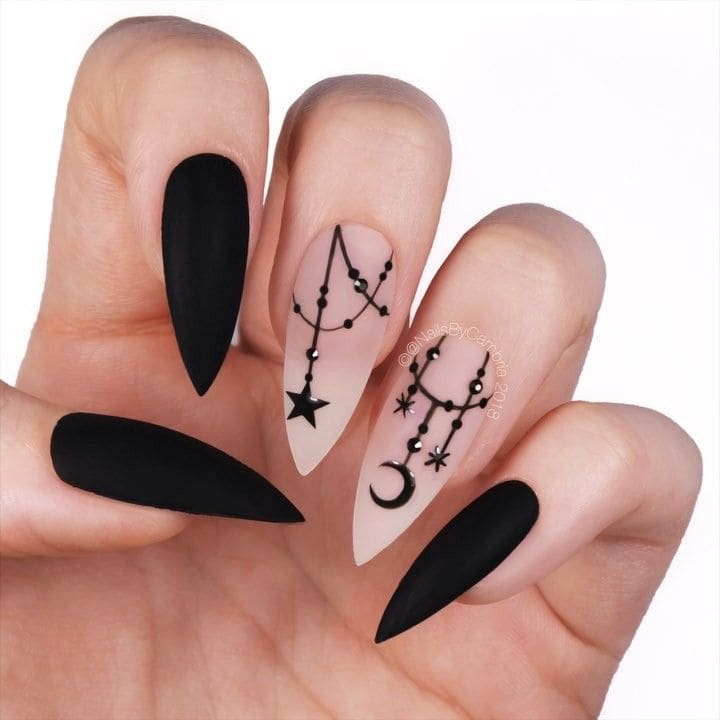
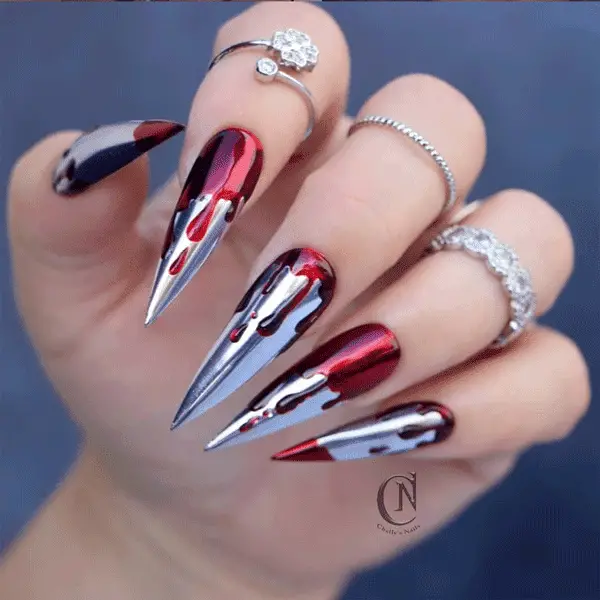
Pop culture Halloween nails offers an exciting opportunity to showcase your favorite elements from the media you love. By infusing these references into your nail designs, you create a visual representation of your fandom and celebrate the creative spirit of popular culture.
Examples of Incorporating Pop Culture References
a. TV Show Themes
Choose a TV show with a Halloween or spooky episode and translate its essence into your nails. For example, if you’re a fan of “Stranger Things,” you can create Halloween nails featuring the iconic alphabet wall or a silhouette of Eleven using her telekinetic powers.
b. Book-Inspired Designs
Select a beloved book with eerie or magical themes and create nail art that encapsulates its essence. If you’re a fan of “Harry Potter,” consider painting each nail to represent a different Hogwarts house, complete with their respective colors and crests.
c. Meme-Inspired Nails
Turn internet memes into nail art that’s both fun and relatable. If there’s a trending meme featuring a Halloween-related character or concept, you can incorporate it by painting the meme’s imagery on one or more nails.
d. Character Portraits
Showcase your favorite pop culture characters on your Halloween nails. Whether it’s a beloved witch from a TV show, a famous monster from a movie, or a quirky character from an animated series, paint their portraits with attention to detail and accuracy.
e. Iconic Quotes
Highlight iconic quotes from your chosen pop culture reference by painting them in stylized typography on your nails. This not only captures the essence of the source material but also adds a creative twist to your design.
f. Logo and Symbol Accents
Incorporate logos, symbols, or emblems associated with the pop culture reference. For example, if you’re a fan of a certain superhero franchise, paint the emblem of your favorite hero on one of your Halloween nails.
g. Narrative Scenes
Create a nail art narrative that tells a story or references a memorable scene from your chosen media. This could involve painting a sequence of images that capture a pivotal moment.
h. Crossover Concepts
Combine elements from different pop culture references to create a crossover design. This showcases your appreciation for multiple sources of inspiration.
Fusing pop culture references into your Halloween nails allows you to showcase your fandom and creativity in a unique and engaging way. By thoughtfully integrating characters, symbols, quotes, and scenes, you’ll create nail art that not only celebrates Halloween but also resonates with your love for contemporary pop culture.
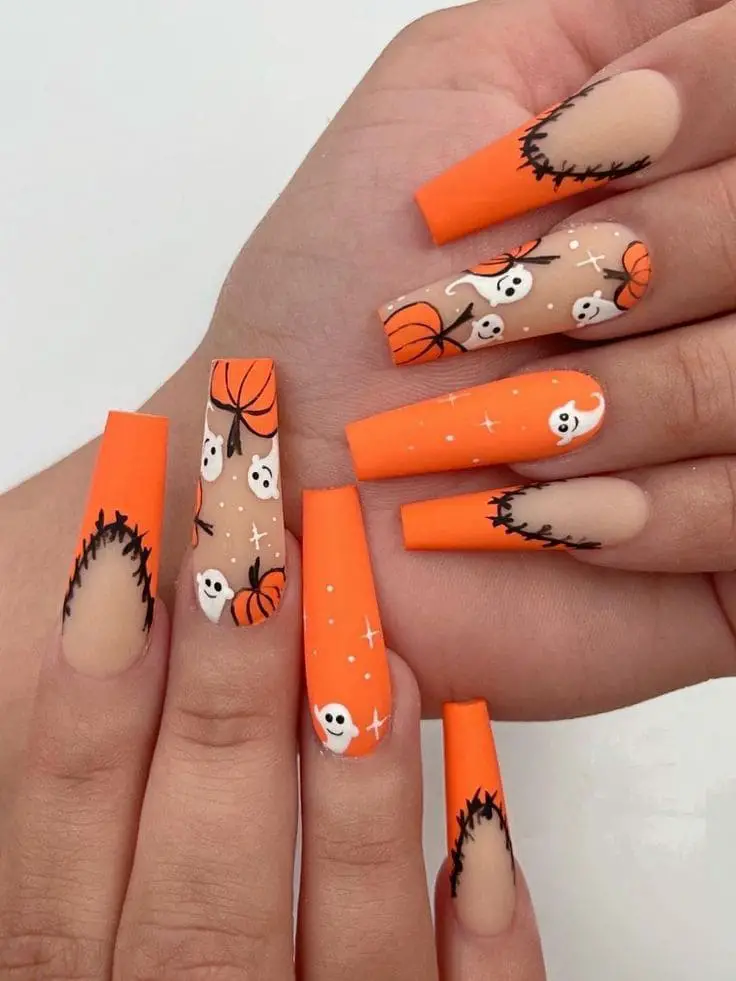
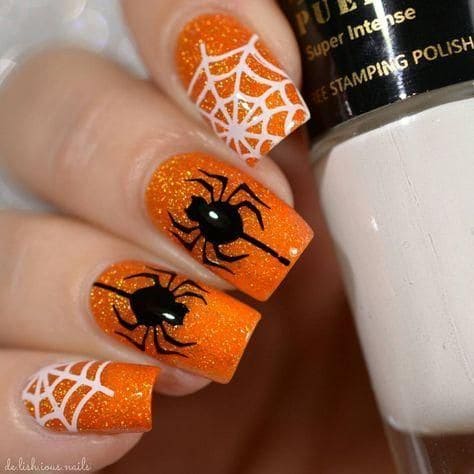

10. Exploring Nail Accessories and Embellishments For Halloween
Nail accessories and embellishments provide a world of creative possibilities for adding dimension, texture, and a touch of luxury to your Halloween nails. By thoughtfully selecting and applying these elements, you can transform your nails into mini masterpieces that capture the spirit of the season.
Guidance on Proper Application Techniques
a. Nail Stickers
Nail stickers are a quick and effective way to add intricate designs to your nails. Here’s how to apply them:
– Start with a clean, dry nail surface.
– Carefully peel the sticker from its backing using tweezers or your fingers.
– Gently place the sticker on your Halloween nails and press it down using a clean cuticle pusher or your fingertip.
– Seal the sticker with a clear top coat to ensure longevity.
b. Nail Studs
Nail studs offer a bold, three-dimensional effect. To apply them:
– Use a small dot of clear nail polish or nail glue on your nail.
– Use tweezers to place the stud onto the adhesive. Gently press it down.
– Once all studs are placed, seal with a clear top coat to secure them.
c. Rhinestones
Rhinestones add a touch of sparkle and glamour. Follow these steps:
– Apply a small dot of clear nail polish or nail glue on your nail.
– Use tweezers to pick up the rhinestone and place it onto the adhesive.
– Gently press down to secure it in place.
– Seal with a clear top coat to protect and enhance the design.
d. Charms and 3D Elements
Charms and 3D elements create a unique tactile effect. Here’s how to apply them:
– Use a small dot of clear nail polish or nail glue in the desired location.
– Gently place the charm or element onto the adhesive.
– Press down slightly to ensure it adheres securely.
– Seal with a clear top coat, paying attention to the edges to prevent snagging.
Sourcing Embellishments
Nail accessories and embellishments can be found at beauty supply stores, online retailers, and even craft stores. Look for specialty nail art stores that offer a wide range of options, from stickers to rhinestones to unique charms. Make sure to choose high-quality products to ensure they adhere well and stand the test of time.
Getting nail stickers, studs, rhinestones, and other accessories allows you to create intricate and eye-catching Halloween nail art that’s uniquely yours. By following proper application techniques and sourcing quality embellishments, you’ll unlock a world of creativity and take your nail designs to the next level of artistry.
Halloween-themed nails stand as an inevitable and distinctive hallmark of the impending holiday. Moreover, they possess the potential to serve as your very costume. This assertion is not intended as an overstatement.
On occasion, circumstances transpire wherein time grows scarce, leaving a fully-prepared costume absent. In such moments of urgency, there is no need for alarm. Simply opt for one of the ensuing Halloween nails art concepts and swiftly proceed to engage the services of a professional nail technician, or alternatively, venture into trying the design independently.

Valerie, Beauty Blogger
Valerie Seow is a renowned nail art enthusiast and prominent beauty blogger, recognized for her impeccable taste and expertise in the industry.
With an innate passion for nail artistry, she has cultivated a distinct artistic touch and shares her insights through a popular online platform. Valerie’s blog serves as a hub of inspiration, featuring detailed tips, trend analyses, and product reviews that resonate with both nail art enthusiasts and beauty aficionados.
Her commitment to elevating nail design standards, coupled with her warm presence at beauty events, has solidified her reputation as an influential figure in the world of nail art and beauty.

